Tag: guest posts

  • Guest Post :: Using Beeswax at Home

    Guest Post :: Using Beeswax at Home

    Written by guest contributor Marlese Hazeu of Candles for Hope.

    My journey into making beeswax candles came somewhat unexpected, but I’ve fallen head over heels in love and have never looked back. Here are a few things I’ve learned along the way.

    1. Wax source: if you can, find a local apiarist (beekeeper) and ask them what they do with their wax. The other option is to head over to a local supplier. I have used BeeMaid in Winnipeg. Keep in mind, there is no quality control for the wax they obtain. One week you may get beautiful clean wax, the next it may be full of bee parts or sediment.

    2. Breaking up the wax: If you end up with a hug slab of wax and you need it to be broken in to smaller pieces, save yourself the headache of painstakingly trying to chisel, slice or chop off a chunk and freeze it instead. Once frozen, beeswax becomes brittle. Place in a bag and smash with a hammer. Kids love this part!

    3. Melting: Always melt wax in a double boiler. Be patient, better to do it slowly on medium heat. Wax is best poured at 160F. Too hot and it will crack when cooled, too cold and it will not pour smoothly.

    4. Filtering: There are various methods. Some use gravity to let the sediment settle and ladle the pure wax off the top. Others use a water bath, with acidified water using simple vinegar. The particles actually are held in the water, once poured off into a pail to cool, leaving a block of pure wax. The other way is long and tedious. It involved straining melting wax through kleenex and a strainer, one ladle at a time, leaving you an extremely pure, clean wax to work with. Also with the most amazing fire starter to use and give away to all your family and friends.

    Things to keep in mind:

    • Dirty wax will sputter, smoke and choke the wick.
    • If you don’t have a designated pot to melt over a double boiler… the pot can actually be cleaned after use quite easily, contrary to popular belief. Simply use cold water, soap and a metal scrubby. It works amazing. Remember, wax becomes brittle when frozen or cold. This works to your advantage.
    • Thrift stores are gold for finding all your beeswax melting supplies (ladle, pots & strainers).
    • Pure beeswax will shrink. That’s one way to know it’s real. Even different batches from difference sources will have different shrinkage percentages. Some people add fillers (other waxes) to lessen the shrinkage. It’s better to fill to the brim to compensate for shrinkage.
    • Wax can naturally be a range of colors from pale yellow to almost brown. It all depends on where the busy bees have been.

    I have enjoyed this process of trial and error and I hope this will help eliminate a few frustrating moments for you with this humble post on beeswax.

    Hazeu-101-1024x681

    marlese photo
    Marlese Hazeu loves the bunnytrails life takes; they bring her to many hidden treasures she would not otherwise have discovered. She loves the outdoors and shares that joy with her husband and 4 crazy kids.

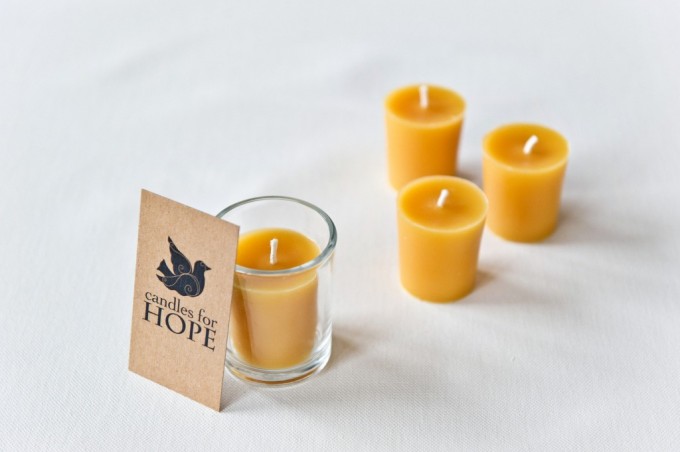
    Marlese is the founder and operator of Candles for Hope, which exists to provide quality, hand crafted, 100% pure beeswax candles for you and your home, with 100% of the profits being given to Mercy in Action.


    Mercy in Action is a non-profit organization that focuses on the crisis in Maternal/Newborn/Child health care worldwide. They have established and funded free birth centers for poor families in the Philippines since 1992, and to date more than 12,000 babies have been delivered free of charge for the poorest of the poor in Mercy In Action’s Birth Centers, and literally tens of thousands of lives have been helped and healed in the medical outreaches. Their current Birth Center is Mercy Midwives Birthing Home outside of Olongapo, Philippines.


    This post was shared as a part of  Montessori Monday at Living Montessori Now,  Natural Living Monday at Modern Alternative Health,  Simple Lives Thursday at Real Food for Less Money/My Humble Kitchen,  Unprocessed Fridays at Girl Meets Nourishment,  Simply Natural Saturdays at The Pistachio Project, and Thank Goodness It’s Monday at Nourishing Joy.

  • Heirloom Offerings :: Tea + Coffee Cake

    Heirloom Offerings :: Tea + Coffee Cake

    This offering to Heirloom Offerings :: The Grandma Project was contributed by Stacy Fuller. Are you interested in sharing? Read our submission guidelines and get started.

    Something I remember about growing up were tea parties with my grandma.  I would have my half tea/half milk, plus lots of sugar, and we’d always have a yummy coffee cake to go with it…warm out of the oven.  Over the past year, I’ve introduced my daughter to tea parties with my grandma… we have tried to have weekly tea parties with her – enjoying our cup of tea, and often, coffee cake.

    It has been so wonderful for me to spend so much time with my grandma…and for my daughter to get to know her great grandmother.  It has been life-giving for all of us.  When we have to skip a week my daughter notices and misses it.  I will always be thankful that we had the time to do that with her.  I hope that it will be something my daughter remembers and I’m hoping that she and I can continue to have tea parties throughout her life – it is such a great time to slow down and be present and connect.


    My daughter and I were both diagnosed with Celiac Disease last year, so we stopped having coffee cake at our tea parties and enjoy other gluten free goodies instead.  I’ve recently found an excellent gluten free recipe that we’ve started to make and it is absolutely fabulous!  Here’s to many more tea parties!!  Cheers!


    stacy grandma project 2


    Almond Coffee Cake

    INGREDIENTS:

    Cake:

    • 2 tablespoons butter
    • 1 cup almond flour
    • 1 cup oat flour
    • 1/3 cup unrefined sugar (or sugar of your choice)
    • 1/2 tablespoon ground flax seeds
    • 3 teaspoons baking powder
    • 3 teaspoons cinnamon
    • 1/2 teaspoon salt
    • 1 1/4 cup almond milk (or milk of your choice)
    • 1 teaspoon vanilla extract


    Crumbly topping:

    • 3 tablespoons butter
    • 1/2 cup unrefined sugar (or brown sugar)
    • 1/3 cup oat flour (or flour of your choice)
    • 1 teaspoon cinnamon
    • 1/4 chopped nuts (optional)


    METHOD: 

    1. Preheat oven to 375 degrees.

    2. Combine sugar, butter, almond milk, flax, and vanilla and set aside.

    3. Sift together flours, baking powder, cinnamon and salt into another bowl.

    4. Gradually combine wet and dry ingredients along with milk and gently stir together. Fill an 8×8 or 7×9, baking pan (or 12 muffin cups) with the batter.

    5. In a small bowl combine crumble ingredients with a fork or with your hands. Mix until just crumbly. Add more flour if the mixture is too wet.

    6. Sprinkle 1/2 of the crumble mixture over muffins and bake for 25-30 minutes.

    7. Sprinkle the last half of the crumble mixture over the muffins after they come out of the oven.


    stacy bio photo
    Stacy Fuller is a stay at home mom to three little ones.  She enjoys spending time outside, cooking, baking and crafting with her kids.  

    {Kris}: Thanks Stacy! Tea and coffee cake are also a part of my grandma memories. Always Red Rose tea. It’s so lovely that you are helping your daughter get to know her great grandma in such a beautiful way.

    Share your memories of tea and coffee cake with your grandma in the comments…


    This post was shared as a part of Wellness Wednesdays and Simple Lives Thursdays.


  • Guest Post :: Fall Cookies

    Guest Post :: Fall Cookies

    Written by guest contributor Maria Epp.

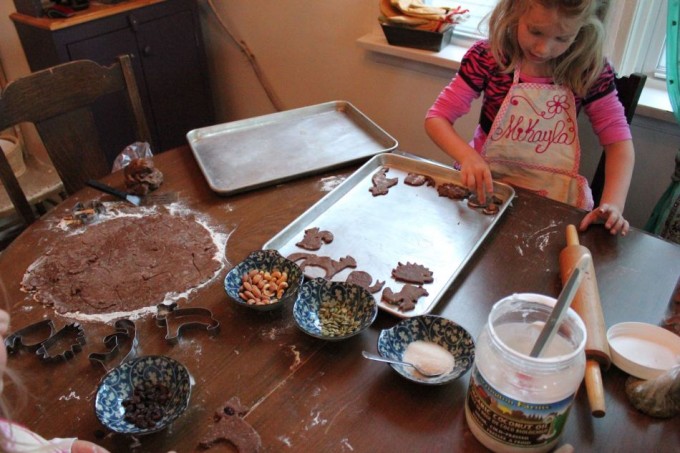
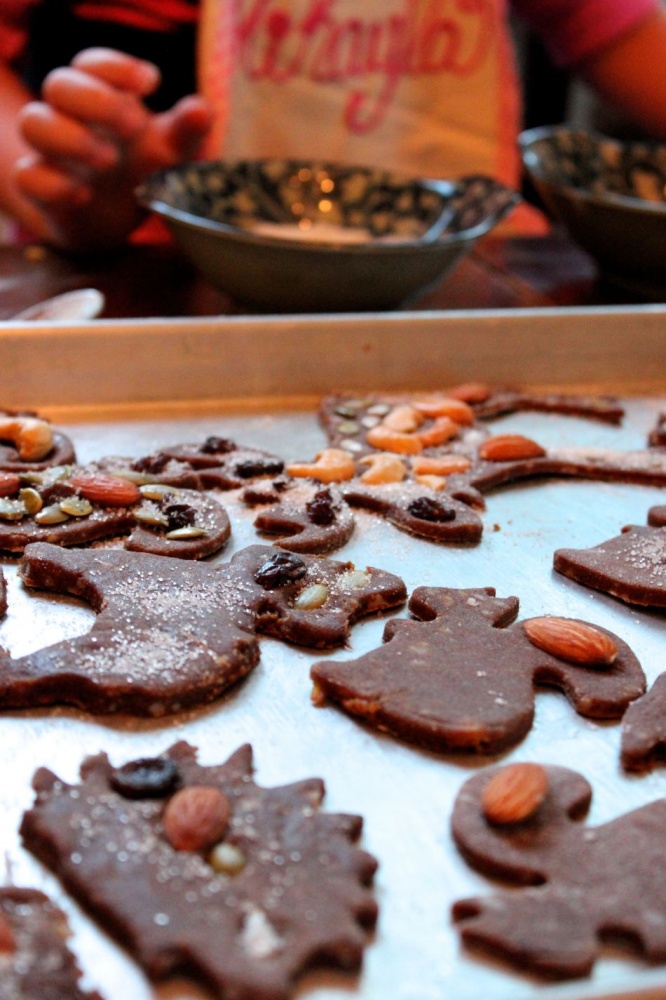
    We had so much fun with these cookies. Iona and I made the dough while Mika was in school. They chilled and after a snack, we attacked the dough. It was hilarious to watch Iona roll out the dough to the thinnest it could be. Also, to see Mika cover the cookies in decorations. I just found this recipe and love it for fall. It is unique because it uses pumpkin purée and has all the lovely spices we crave in the fall.

    A special note to moms, do not put the oven on when starting to roll out the dough with your kids because it will take much longer than you think to actually get them in the oven! Also, have something planned for supper or you might be still wondering at 6:00 what you’re going to make. The kids don’t mind! They’re filling up on cookie dough!

    img_7749img_7756img_7757

    Gluten-free Gingerbread Cut-Out Cookies courtesy of The Whole Life Nutrition Cookbook, Alissa Segersten from Nourishing Meals

    • 1/2 c  Softened Virgin Coconut oil
    • 1/4 c Whole cane sugar
    • 1/4 c Maple Syrup
    • 1/4 c Blackstrap Molasses
    • 1/2 c Pumpkin Puree
    • 1T vanilla
    • 1/2 tsp sea salt
    • 2 c brown rice flour or sorghum flour
    • 1/2 c tapioca flour
    • 2 tsp baking powder
    • 1 1/2 tsp xanthan gum
    • 1 1/2 tsp cinnamon
    • 1 tsp ginger powder
    • 1/2 tsp ground cloves
    • 1/4 tsp ground nutmeg

    1. Whisk together the coconut oil, sugar, maple syrup, molasses, pumpkin puree, vanilla, and sea salt.

    2. In a separate bowl, combine the flours, baking powder, xanthan gum, and spices. Add the dry ingredients to the wet and mix well.

    3. Form dough into a ball and wrap in waxed paper; place in the refrigerator to chill for about 20 minutes.

    4. Preheat oven to 375 degrees F. Lightly flour surface and roll out the dough to 1/4″ thick. Cut out with your favourite cookie cutters.

    5. You may decorate the cookies before baking by gently pressing whole nuts and seedssuch as almonds, peans, or pumpkin seeds into the cookies. Bake for about 15 minutes. Then remove from cookie sheet and place onto a rack to cool.


    maria bio photo

    Maria Epp is mom to two beautiful girls, partner to Nathan, and creative explorer with a passion for nature and working with her hands.