Author: kris

  • Advent Week 3 Activity :: Bird-Watching with Kids

    Advent Week 3 Activity :: Bird-Watching with Kids

    If you are following along with the Advent series, you can get to the original post here, and the Week 3 post here.


    One of the simplest and most rewarding ways to learn about animals in the winter is bird-watching. It can be done indoors or out, and is a great activity to engage little ones. For this reason, our week is going to focus on birds – feathers, crafting bird-seed feeders, painting tiny bird house ornaments, visiting a local animal shelter…

    Here you’ll find info about our two favourite bird books, as well as a printable bird-watching checklist that would make a great addition to your advent calendar, or a fun thing to share with your children any time of the year.

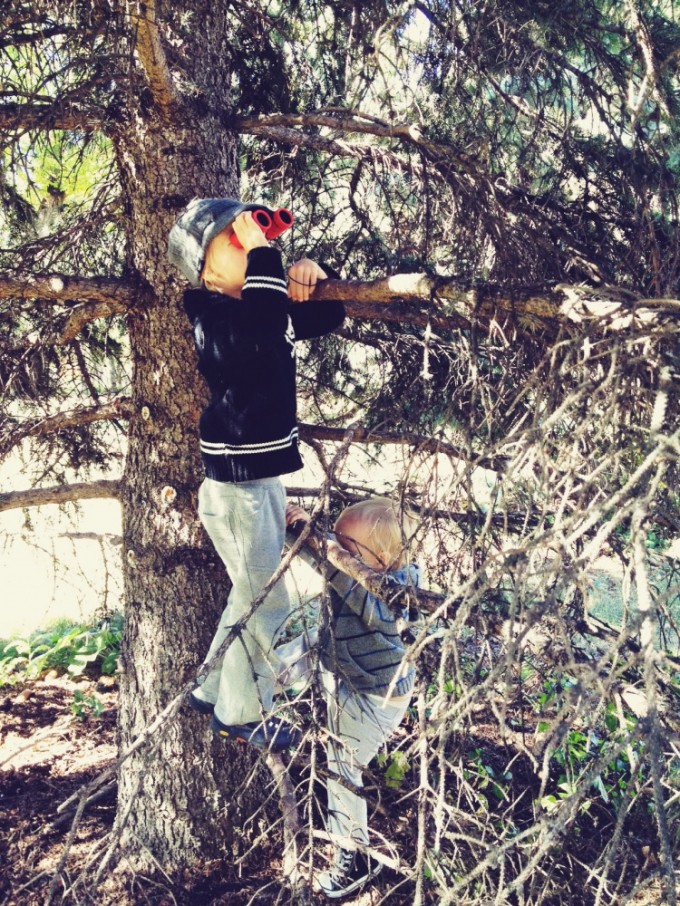
    tree bird watching new

    What do you need to start out?

    Binoculars
    A few years ago we purchased two basic bird identification books, and started a little basket with the books and a set of nice binoculars (which were very affordable at under ten dollars). The binoculars come with us on nature walks and have taken quite a beating over the past four years or so! Well worth the small investment.

    Books
    Strangely, both books are titled Backyard Birds. One is the Peterson Field Guides For Young Naturalists: Backyard Birds, and the other is Backyard Birds: An Introduction. The first is a fantastic resource with colour coded sections according to the main colour of the bird. It is easy for kids to navigate and has a digestible amount of information for beginners. The second one we love for its beautiful paintings of birds by Robert Bateman.

    Either (or both) of these books would make a lovely advent or Christmas gift.

    Checklist
    I created a mini ‘life list’ for the kids back when we first created our bird basket, and the kids check off birds they spot and identify using our books. It turned out to be a really fun pastime for the whole family.

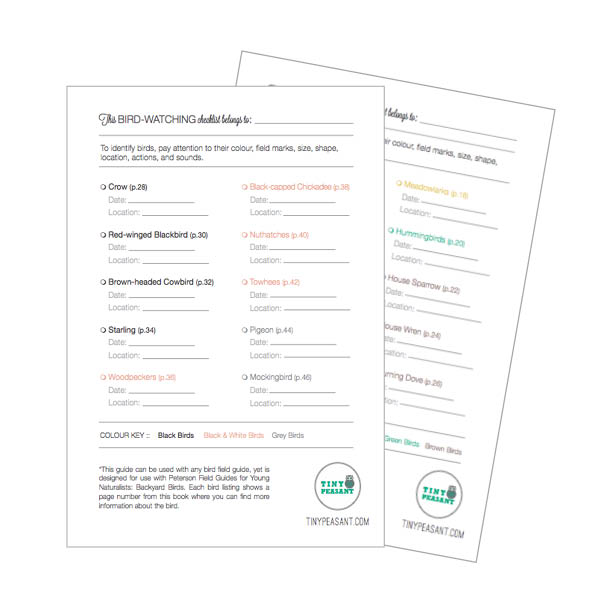
    Recently, I updated our bird-watching checklist to share with all of you, and I truly hope you and your little ones will enjoy it as much as we do. There are two versions available – one is designed to work in partnership with the Peterson guide and the other can be used on its own or with another book. Print if off and keep it in your own birding basket, or in your backpack to go along on nature walks. You can download it here.

    tiny peasant bird-watching checklist preview


    This post was featured at Thank Goodness It’s Monday, and shared as a part of Thank Goodness It’s Monday, and Montessori Monday.

  • Gifts Kids Can Make + Give

    Gifts Kids Can Make + Give

    Below are twelve gifts that are simple and engaging enough for kids to make as Christmas or other gifts for teachers, friends, and family. Some have links to posts that we’ve published here at Tiny Peasant, and others are just to provide the idea or send you somewhere else to get the full instructions! All of them are things that our little ones (and older one) have made and so they are tried, tested and true.


    CRAFTS

    1. Felted Stone Paperweights or Decorations

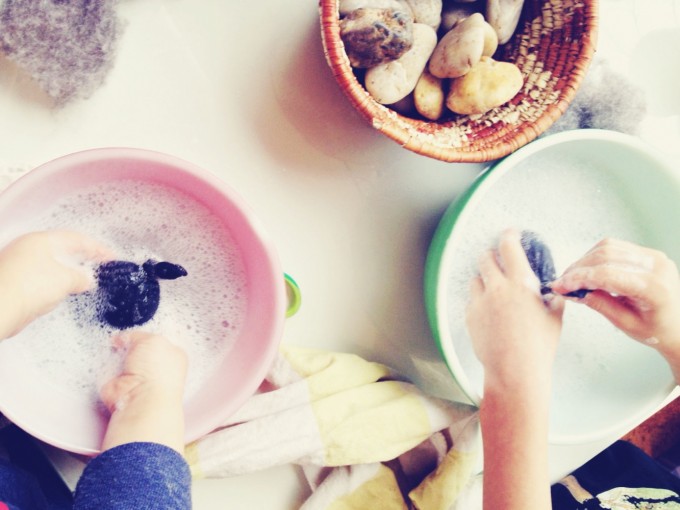
    Kids love the warmth of this activity, as they dip their hands into warm soapy water. The resulting felted stones can be gifted for use as a decoration or paperweight. Find our how-to post here.
    felted stones - rubbingfelted stones finished


    2. Felted Soap

    Follow the directions for felted stones. Replace the stones with soap. Leave the dish soap out of the water, as the soap itself will provide the suds.

    You can include a little note, if you’d like, to use it just like regular soap, as some folks might think it is just decorative!

    We also sell Tiny Felter kits in the shop, if you’d like to get the supplies there for gift-making – and they also make a sweet stocking stuffer or gift for future crafting as well!

    making felted soap felted soap

    IMG_3672

    3. Framed Artwork

    Purchase affordable frames from a local store (IKEA for example) and frame some of your children’s artwork to give as gifts. Try talking with your little ones about drawing something that their recipient will be interested in or love. Check out some how-to-draw books from your local library if your crew would like some inspiration.

    framed artwork

    4. Mason Jar Candles

    When we were making mini pumpkin candles this fall, we had leftover melted beeswax. I had a nice short mason jar on hand, as well as extra supplies, so quickly made a simple mason jar candle. This would be a very simple thing to do, though might not have enough steps to safely include little ones. I think it would be a great project for teens! You can find instructions here – just use a jar or other container instead of a pumpkin. Also check out this helpful post: Using Beeswax at Home.

    A friend of ours made a lavender flower version of these. Oh my goodness. Yes.

    mason jar candle lit mason jar candle

    5. Play Dough

    If you have flour, salt, cream of tartar, oil, and some elbow grease, you are ready to go! Check out our recipe for pumpkin spice play dough (both regular and gluten free), and omit the spice, adding in an essential oil such as orange or lavender, if desired. Package up your homemade play dough in mason jars or tupperware, put a label or some nice patterned fabric under the sealer ring, and you have a great gift for little ones. You can also try gingerbread play dough for the holidays!
    Tiny Maker Kit


    PANTRY

    6. Herbal Tea Blends

    Just fill your jar or tin with healing herbs! Add a label or tag with instructions if necessary. So, so simple for little ones and truly a lovely gift. If you can get outdoors and collect some of your own herbs to include, even better. The rose hips shown were harvested by our three and six year olds.

    We made pine and cedar tea blend, as well as a rose hip, nettle, and elderflower blend. Get creative or look online for ideas!

    pine-cedar tea giftsHerbal Tea Gift

    7. Herbal Salve

    Even though this seems like it would be an involved project, it is really quite simple with a decadent result. Get the recipe here. You can also find our Tiny Herbalist kit in the shop, a beautiful cotton pouch stocked with tins, beeswax, recipes, labels, a beautiful handmade herbal journal and more.

    calendula salve gifts

    8. Essential Oil Lip Balm

    We made these last year, using a great recipe that was simple to follow with fairly basic ingredients. Bonus: You’ll also find a recipe for peppermint bark on the same page as the lip balm recipe!
    vanilla packaged

    9. Vanilla
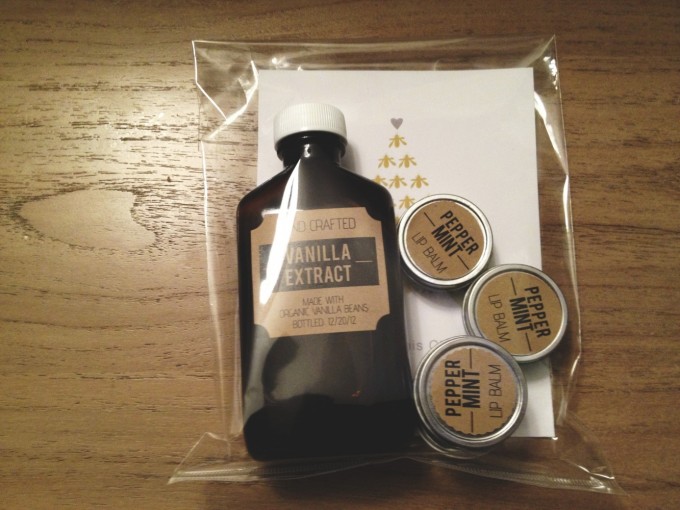
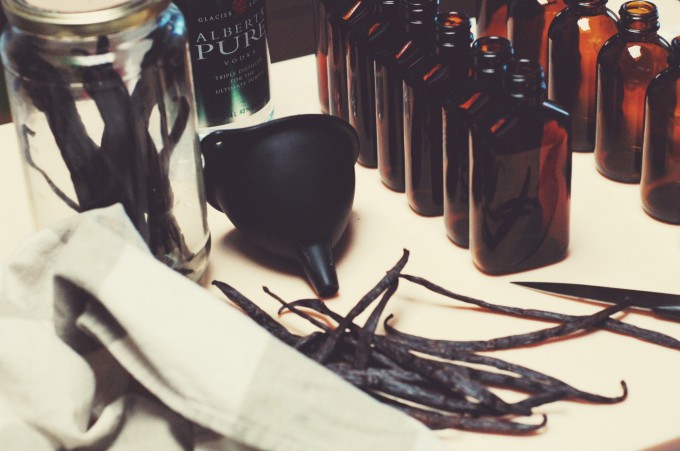
    It truly doesn’t get much simpler than this. Older kids can help with scoring the beans, and all ages can drop the beans into the bottles, and help with the funnel and pouring. You can get the full instructions in our how-to post, which also links to our free, printable vanilla labels.
    vanilla supplies

    10. Fair Trade Fudge

    We made this using Cocoa Camino fair trade chocolate. So, so good! Get instructions and flavour ideas here.

    peppermint candy cane fudge

    11. Homemade Cookies

    Make your favourite recipe, and put it in a pretty package to gift to friends, family or teachers. We made peppermint shortbread. We left out the chai, and subbed at least part whole grain flour and a whole sugar…

    Another favourite is Spruce Tip Shortbread cookies. Get it the recipe here.

    You’ll find ten great cookie recipes in the ebook Nourishing Cookies for a Healthy Holiday by Diana of My Humble Kitchen.

    teacher gifts - cookies 2 teacher gifts - cookies

    12. Chocolate Dipped Goodies

    You can use regular or gluten-free pretzels, or any other treat (almonds, homemade gummies, earth/bliss balls, homemade cookies) for this recipe. Using a double boiler, simply melt about 3 tablespoons of coconut oil along with 1.5 cups of fair trade chocolate chips, baker’s chocolate, or a chocolate bar. If you’d like it to be sweet, add a few tablespoons of honey (if you are using chocolate with added sugar, this won’t be necessary). Use tongs to dip the pretzels into the melted mixture and then lay on a cookie sheet to set. Package up in a canning jar or other nice package!

    chocolate pretzel love


    This post was featured at Real Food Forager, and shared as a part of Thank Goodness It’s Monday,  Natural Living Monday,  Fat Tuesday, Simple Lives Thursday and Simply Natural Saturdays.

  • Simply Healthy Fudge

    Simply Healthy Fudge

    This is some seriously simple fudge! With some nourishing ingredients, and no added sugars, I’m thinking it is going to make an appearance several times in 2014! We made this our official December recipe for our 10 year old’s baking program, which means we *had* to make it three times. Ahem.

    We  decided to make it a candy cane fudge, by adding some crushed candy cane and peppermint to the mixture and more crushed candy cane on top. Of course, this isn’t a super healthy fudge anymore, but the basic recipe is sugar free and you can easily keep it that way! There are a lot of suggestions at the end of the post for other flavours, many of which sound so good, and good for you.

    BASIC RECIPE

    Ingredients:

    • 2 cups dark, fair trade chocolate (we used cocoa camino baker’s chocolate and topped off with enjoy life chocolate chunks because we didn’t have enough cocoa camino left to make 2 cups – note that the chunks have sugar, so I recommend the straight dark chocolate)
    • 1 cup coconut milk (the thicker part from the top of the can)
    • pinch of sea salt

    candy cane fudge ingredientscandy cane fudge crushed

    Instructions:

    1. Break up chocolate, if necessary.

    2. Add all ingredients to a double boiler and melt over low heat.

    fudge heating up

    3. Add any optional ingredients.

    adding extras - fudge

    4. Pour into a square baking dish lined with wax paper.

    fudge finished

    5. Add any optional toppings.

    6. Set in the fridge.


    FLAVOURS TO TRY:

    I am super excited to try some of these in the near future. Particularly, maple walnut, toffee + salt, and orange + macadamia. Yum.

    • candy cane / peppermint
    • vanilla
    • maple walnut (maple syrup + walnuts)
    • pumpkin
    • toffee + salt
    • peanut butter (or sunflower butter, etc.)
    • coconut
    • orange zest + macadamia nut
    • white chocolate + cranberry

    What is your favourite kind of fudge? Share in the comments!


    This post was featured at Thank Goodness It’s Monday and Simply Natural Saturday, and shared as a part of Natural Living Monday,  Fat Tuesday,  Simple Lives Thursday, Fight Back Friday, Unprocessed Fridays, and Simply Natural Saturdays.

  • This Moment

    This Moment

    “A Friday ritual. A single photo – no words – capturing a moment from the week. A simple, special, extraordinary moment. A moment I want to pause, savor and remember.” {joining Soule Mama today} If you’re inspired to follow along, please leave a link to your moment in the comments!

  • Advent Week 2 Activity :: Plant Based Decorations

    Advent Week 2 Activity :: Plant Based Decorations

    If you are following along with the Advent series, you can get to the original post here, and the Week 2 post here.


    While I’m not a big fan of crafts made out of food, I do love the simplicity of popcorn garlands. We love to mix popcorn and cranberries and then rather than hanging the garland on our tree indoors, we hang them outside as a gift to the animals in our neighbourhood.

    Materials:

    • popcorn
    • fresh cranberries
    • thread
    • needles
    • scissors

    Just thread the needles with quite a long thread and tie at the end. Thread the popcorn and cranberries on – a fun way for little ones to practice making patterns! These photos are from last year’s garland making adventure.

    cran pop making

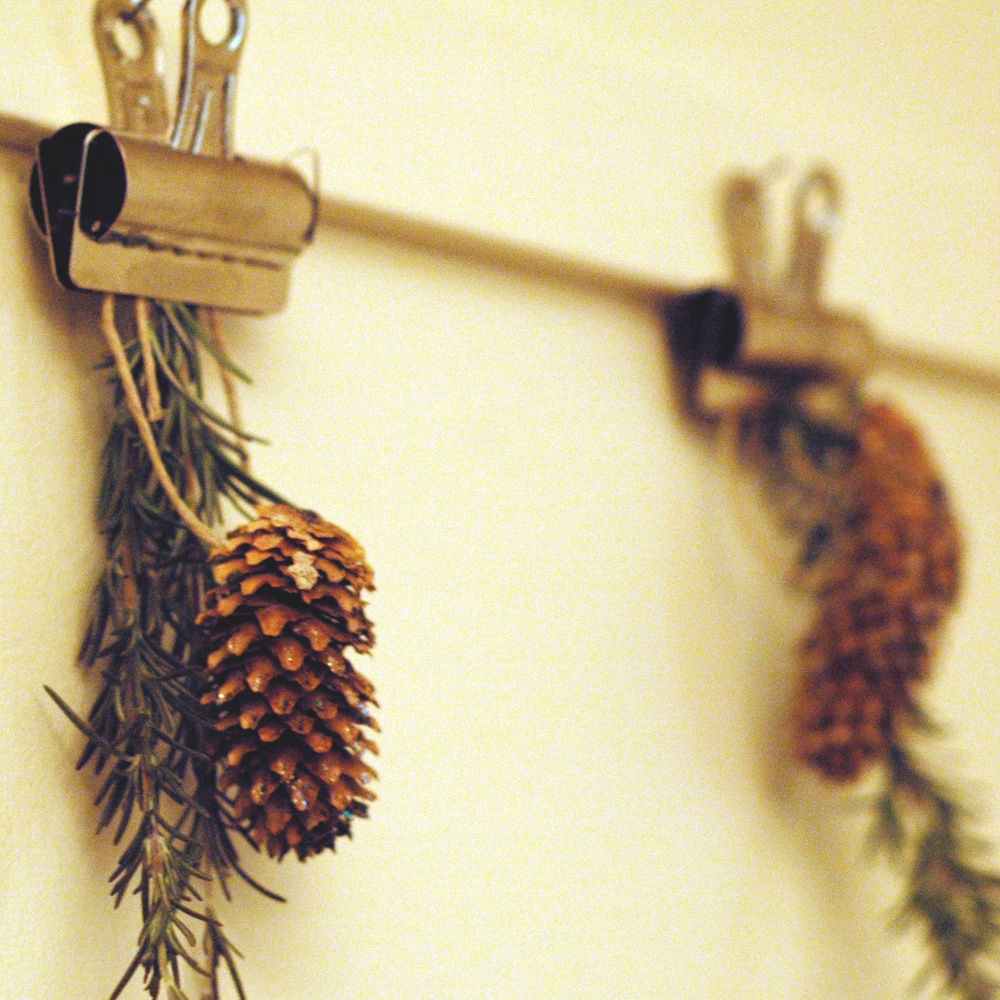
    For another plant based garland idea, gather a basket of pine cones, small sticks, seed heads, seed pods, etc. and thread them with a needle or tie them onto twine. For the third week of Advent, the light of animals, I have a basket of feathers ready to go that might work their way onto a garland or two, or another decoration depending on what the kids dream up. Yesterday, a friend of ours set up a fun craft to paint pine cones with glitter paint – these are beautiful and would make a lovely garland or Christmas tree decoration.

    glitter pine cones

    Other ideas – dip the bottoms of the pine cones in non-toxic paint to coordinate with your Christmas decorations or home, or, try this gorgeous and warm idea to wrap pinecones in yarn (idea and photo from Teal & Lime). This might be happening over here this week, as it’s just too good to pass up – a trip to our local wool shop is in order as I think our stash is low! I’m seeing deep red, teal green, grey, mustard yellow…

    Does your family craft any natural decorations over the holidays? Share about them in the comments!

    yarn-wrapped-pinecone-garland-on-banister


    This post has been shared as a part of Simple Lives Thursday and Montessori Monday.

  • Advent Week 2 Activity :: Herbal Salves

    Advent Week 2 Activity :: Herbal Salves

    I’m just going to share a little bit about Calendula and how to make an infused oil, and then you’ll get a wonderful salve recipe and photos contributed by Maria Epp. If you are following along with the Advent series, you can get to the original post here, and the Week 2 post here.


    Calendula is an all around wonderful healing plant. It heals skin gently, helping rashes and skin conditions, and is anti-microbial and anti-fungal. For more information, check out the calendula page at hollowreedholistic.ca.


    Also, if you are wanting to start little ones off with herbal salves, lip balms, and identifying and learning about edible and medicinal plants, be sure to take a look at our Tiny Herbalist kit for kids.


    Please share your favourite herbs for healing salves in the comments!


    Calendula Infused Oil
    It’s very simple to make an infused oil.


    1. Start with dried flower heads or petals. Some people use fresh herbs, and I have also read to dry them first as the fresh herbs contain water and that can lead to mould in the salve. If you are concerned, please do some reading and make an informed choice.

    IMG_7084

    2. Using a mortar and pestle or just your hands, mash up the flower heads, to separate the petals and free some of the healing oils of the plant.


    3. Fill a clean, dry, canning jar about half full with the flowers.


    4. Add organic olive oil (or oil of choice) to the jar, keeping in mind that the fresh flowers will take up, or absorb, less oil than the dried. Cover 1-2″ above the flowers. If the oil ever goes below the level of the flowers, top it off to cover back to 1-2″ above.


    5. Choose one of three options:
    • Place the oil in a sunny spot (sun-infused oil) and gently swirl once or twice a day for 10-20 days. This is the method that Maria and her family used to make their infused oil.
    • Place the oil in a dark cupboard (cold-infused oil) and gently swirl once or twice a day for 10-20 days.
    • Make a quick infusion (if you’re like me and would like to make it this week for Christmas gifts!). To do this, heat the oil and flowers gently (no higher than 120 degrees) for 4-6 hours. You can use a crock pot, yogurt-maker, double-boiler, or even a coffee pot heater.

    6.
    Strain the herbs out of the oil and use  1 cup of the infused oil for the recipe below!


    IMG_8213


    Calendula Beeswax Salve
    Recipe and all amazing photos in this post by Maria Epp.


    Ingredients
    • 1/4 c Beeswax chunks or grated
    • 1 c oil – infused with calendula petals

    Instructions

    1. Melt gradually in saucepan.
    2. Add 5-10 drops of essential oil if desired.
    3. Pour into jars.
    4. Cap and let cool.


    Shelf life of 1-2 years.


    IMG_8212IMG_8344

    maria bio photo

    Maria Epp is mom to two beautiful girls, partner to Nathan, and creative explorer with a passion for nature and working with her hands.


    This post was shared as a part of Simple Lives Thursday and Unprocessed Fridays.

  • Dressember :: Day 9

    Dressember :: Day 9

    First, I promise we wore dresses for the last couple days – we just didn’t get a chance to photograph them. So, we will carry on from here!

    There are still two days left to enter our giveaway of Urban Peasant neckwear! Head on over and enter!

    dressember 9 b

  • Advent Week 2 Activity :: How to Make Vanilla

    Advent Week 2 Activity :: How to Make Vanilla

    If you’re following along with our Advent series, you can find the original post here, and the Week 2 overview here.


    Making vanilla is worth it just for the smell alone. I had a pile of little ones on my lap after I wrapped up, just because my hands carried the sweet scent of fresh vanilla beans.

    This is one of the easiest kitchen projects you’ll come across and you reap the reward of a high quality product at a fraction of the cost of store-bought organic vanilla. This made great a great gift for friends and teachers last year and would make a lovely hostess gift.

    Let’s look at the cost breakdown.
    I purchased a 1.14 L (1140 ml) bottle of vodka for $31.25. This works out to 11.4 bottles, if using 100 ml bottles like I was. Since the vanilla beans displace some of the liquid, let’s say we can get 13 bottles from 1.14 L. That works out to $2.40 per bottle for the vodka. My vanilla beans cost about .55 per bottle, plus my bottle cost which was about $1.30 each. This brings me to $4.25. I’ll add on .25 for the labels, for a grand total of $4.50 for vanilla made with organic beans (though not organic vodka). Great. Now some of you know how much your Christmas gift cost. ; )

    You really don’t need to use the amber bottles, and can use whatever you have on hand. In fact, if you’re making it just for yourself, you can go ahead and toss the correct ratio of vanilla beans right into your vodka bottle. Take off the $1.30 per bottle, and you are down to $3.20 for 100ml.

    Here in Manitoba, a local supplier carries organic vanilla at over $15 for 118 ml. Wow. On Amazon, I could only find 59 ml bottles, which retailed for over $10.

    If you’re doing this activity with children, try working with them (or if they are old enough they can do it on their own) to figure out your costs of production…

    Ingredients

    • High quality vanilla beans (we use organic beans from Real Raw)
    • Vodka – you can use any vodka – organic would be nice to avoid gmo ingredients, but use whatever you can get your hands on. You can also use other alcohols such as rum, brand, or bourbon.
    • Bottles – we use 100ml amber bottles, as I like to give these as gifts over the holidays. You can use almost any kind of jar you have on hand, as long as it is clean and seals well.
    • Funnel
    • Knife and cutting board

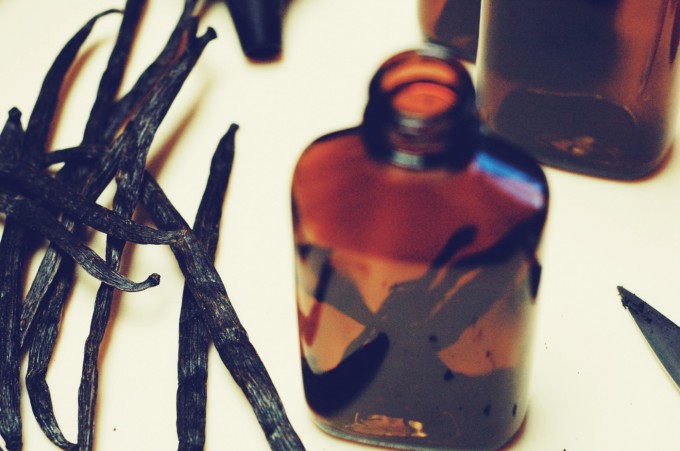
    vanilla supplies

    Instructions

    1. The ratio for vanilla is 6 vanilla beans per cup of alcohol (though I’ve heard as few as 3 per cup and as many as 8 per cup). I used 2.5 beans for each 100ml bottle.

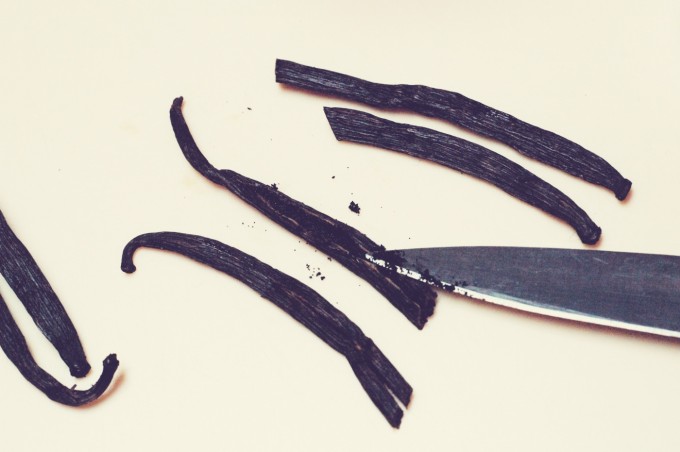
    2. Slice the beans lengthwise, just enough to open them up – not to slice them in half. This allows the vanilla flecks to get out and mingle with your alcohol.

    3. Slice the beans in half if necessary to fit into your jars or bottles.

    split the bean

    4. Place the beans in your jars or bottles.beans in the bottle

    5. Using a funnel, fill the jar, leaving some air space, and seal.add the alcohol

    Place in a dark cupboard for 6 – 8 weeks, giving it a shake each day, if you think of it. Sampling is allowed. Ahem.

    Once you’ve used up your vanilla, you can add more vodka to the bottle, and add scraps of vanilla beans if you collect them while baking – or just add another whole bean.

    Vanilla makes a great gift. With a simple raffia ribbon or popped into a nice package, the bottles of vanilla themselves make a beautiful gift and require no fancy gift wrap. Print out our labels to make your bottles extra special. The front label has basic info, and the back has instructions for the person receiving the vanilla, so they will know how long to let it sit, and how to replenish it once it is used up.

    vanilla packaged


    This post was featured over at Real Food Forager and Girl Meets Nourishment, and shared as a part of Thank Goodness It’s Monday, Natural Living Monday,  Fat Tuesday, Simple Lives Thursday, Fight Back Friday, and Unprocessed Fridays.

  • The Great Christmas Tree Dilemma

    The Great Christmas Tree Dilemma

    We’ve been married for over eleven years and have had little ones for over six of those. Ever since we were married, we made a commitment to live simply, to respect the environment, and to create a peaceful and warm home environment. So, where do Christmas trees fit in to all of that?

    Mike’s family had some real trees here and there, though we both grew up mainly with plastic trees. Were our Christmases any less special? Absolutely not. That said, we love the smell and look of a real tree and so that is what we did for a few years. Until we realized we were buying chemically treated trees, and well, cutting down trees. 

    So, what did we end up doing instead of plastic or the regular store-bought “fresh”cut trees? We haven’t found a perfect solution, and below are a few things we have explored.

    decorating tree 3

    1. Potted Norfolk Pine

    For a year or two, we choose to purchase a potted topical pine tree, called a Norfolk Island Pine. These are a fantastic option for:

    • Anyone living in a small space
    • Folks who want to simplify on the consumer side of Christmas and keep it small – smaller tree, fewer decorations – and just a few gifts look like a mountain under these babies!
    • Those who want something real without cutting down a tree
    • Someone with a green thumb – these plants don’t take care of themselves and have to be misted and cared for. We killed ours even though I garden a lot, and then realized we weren’t really much ahead of where we’d be in our mission for simplicity and care for the environment had we bought a cut tree.


    2. Natural, Fresh Cut Tree

    We did a lot of reading about Christmas tree options, and have read articles that tout plastic trees as more environmental due to their longevity and reusability, the fact that they aren’t cutting down oxygen producing trees, etc. We still didn’t feel that plastic was something we wanted in our home – particularly at that magnitude. So, we circled back to fresh cut trees. We are fortunate to have a couple pesticide-free tree growers in our province (Country Pines in Tyndall and Eden Ridge near Steinbach, for those in Manitoba). You can go and pick your own to cut and warm up with hot chocolate while you’re on their beautiful farm. This has proven the best option for our family over the past several years. This is a good option for us because:

    • We get an organic tree that is free of pesticides and doesn’t off-gass. We also learned that many Christmas tree growers actually spray their trees green. Our local grower said they already weren’t using chemicals or this paint procedure and so started to share those facts with consumers. We are delighted.
    • We love the warm, inviting nature of our real trees – the smell, the feel of the needles and bark…
    • The farmers plant more trees. They produce oxygen. This is good.
    • We get to support a local organic farming family!

    mike with cut tree hot cocoa at tree farm at the tree farm

    If you get a fresh cut tree and if it is organic or pesticide-free, consider honouring your tree by using all of it, or as much of it as you can. After your celebrations are over, harvest the pine needles for use in healing teas and other recipes. Pine needle tea is high in vitamin C and is supposed to be good for whooping cough. Local expert Laura Reeves says that though pine needles are great for breaking up phlegm, she sticks to the tea and chewing on the needles as the syrup is quite “medicinal-tasting”.

    Pine Needle Recipe Roundup

    Please do not consume anything that has not been properly identified. If you’re not sure, seek out a local professional.

    Pine Needle Tea (really cute video instructions here)

    Pine Needle Vinegar

    Pine Needle Juice/Cocktail (swap agave for honey!)

    Pine Needle Cake (I recommend subbing in unrefined sugar and whole flours) – some good info here on tasty varieties

    Pine Needle Syrup (again, sub an unrefined sugar or honey)


    DIY Tree Trunk Crafts Roundup
    You can also use the trunk for making crafts –  simple slices of trunk for block play, coasters, decorations, and if you carve or have access to tools like a drill press, then the options are many (think candle holders, wooden spoons, wood toys, and more. Below are just a few ideas…


    Pencil Holder

    Wood Blocks for Kids

    Tree Branch Fridge Magnets

    Tree Branch Coasters


    3. Live Potted Tree (to plant after the holidays)

    Another option – and probably the best one, that I haven’t found here in Manitoba is to purchase a live, potted Christmas tree. If you’re lucky, you’ll have a place like this in your city… Decorate and care for the tree through the holidays and then find a special spot to plant the tree in your yard or elsewhere after the holiday season. Some of these companies rent you the tree and then plant it afterwards for you. This is truly our favourite option, if only we could figure out the details!


    Happy Tree Hunting!

    I hope you will find some inspiration here as you hunt for the perfect Christmas tree. Please note that these ideas are based solely on our personal opinions and preferences. I’m sure there are myriad articles on the merits of plastic trees vs cut trees and vice versa. I think that if you are giving this some thought, that you are on the right path in finding the best solution for your family. And that is what matters most.

    Share your tree ideas in the comments!


    This post was shared as a part of Simple Lives Thursday,  Simply Natural Saturdays, Thank Goodness It’s Monday, and Natural Living Monday.

  • Dressember :: Day 6

    Dressember :: Day 6

    Even though it took all day to get a photo taken (thus the darker evening light and grainy texture), we were both wearing our dresses all day. It was a busy day of Christmas crafting and decorating – pipe cleaners, crocheting, pasting and play dough; stockings and sparkling white lights… things we are so fortunate to experience. I thought often in the last couple days of this article that was shared on Facebook about someone from my city who was trafficked into the sex trade right here.

    dressember 6 2

    If you are just popping in to these Dressember posts for the first time, there are a series of posts from an intro and then days 1 through to today. Also, we’re offering a giveaway, which you can enter in the comments of the Day 5 post.

    Would you like to donate to Dressember? Head over to my campaign page – any donation is appreciated!

    Blessings,

    Kris