Author: kris

  • The Week in Photos

    The Week in Photos

    Lots of home photos as usual, as I rarely want to bring the big camera out in 40 below (or, any below really), and the iPhone battery goes oh so quickly in this weather… The kids are still enjoying daily excursions out to the backyard fort, or the neighbourhood park and playground where there is a community fort that is worked on by various visitors from the neighbourhood. I just love that kids can be connected in that way, each adding their own architectural touches to the structure – and that it hasn’t been knocked down by possibly less enthusiastic kids.

    What we’ve been up to this past week…

    :: Morning tea + story time

    :: Learning about birds and bird-watching

    :: Projects on cats, video game development, and electricity

    :: A special visit by papa who helped make a circuit board

    :: A certain little boy has learned how fun it is to stuff a pillow in his shirt and then slam himself into things, because ‘it doesn’t hurt’

    :: Wet felting and baking cookies at homeschool co-op

    :: Making all kinds of contraptions (the one shown was made to see if air would go through the tube)

    :: Exploring math through a Waldorf approach with a set that we crafted together

    :: Using some of the Waldorf math set as building blocks and to explore electrical current

    :: Swimming lessons and our first time at a water polo and kayaking night at the pool

    :: Making Maple Butter Calendula Popcorn – oh so good!

    :: An almost-daily coffee break for mama

    :: A fun friday night sushi dinner and a lovely weekend pumpkin pancake breakfast

    tiny peasant owl moontiny peasant bird watchingtiny peasant bird learningTiny Peasant PBH catstiny peasant making a circuittiny peasant homeschool co-op bakingtiny peasant air contraption  tiny peasant divide activity 2tiny peasant divide activity   tiny peasant stacking starstiny peasant stacked starstiny peasant star currenttiny peasant swimtiny peasant mama coffee break tiny peasant sushi makingsaturday morning pancakes    

  • This Moment

    This Moment

    “A Friday ritual. A single photo – no words – capturing a moment from the week. A simple, special, extraordinary moment. A moment I want to pause, savor and remember.” {joining Soule Mama today} If you’re inspired to follow along, please leave a link to your moment in the comments!

  • rhythm + rice

    rhythm + rice

    Rice for the Weekrice pudding gran's dishes
    Folks, this is such a simple post! These two little things, though, have really made a lot of difference in our meal planning and weekly meal rhythm that I wanted to share them with you.

    For many years, we’ve been planning our meals with a framework of each day being earmarked for a certain main ingredient or type of food – pasta, rice, soup, nachos, pizza, frittata, chicken, etc. It has been so helpful to know what main ingredients to have stocked in our home, has helped the kids to have a sense of rhythm to our week, and still allows for so much freedom within the framework. You can find our menu planning resources, including tips and printable blank menu planners, grocery lists, and more over in the shop.

    One of our struggles, though, has been breakfast. It’s so easy to get stuck in a rut with this one – toast, toast, yogurt, toast, eggs… We do aim to have a breakfast rhythm as well, and it generally looks more like oatmeal, toast and eggs, yogurt with fruit and granola, repeat until the weekend when we have pancakes/waffles/eggs/etc.

    So what changed recently? Well, I started making a big pot of brown rice on sundays. One 750ml jar makes enough rice for a breakfast of rice pudding on monday, and a rice-based meal on tuesday. That rice based meal might be stir-fry, chicken or veggie fried-rice, a casserole, etc. There is still so much flexibility, but no 4pm panic around what to put on the table. So that one act of dumping a jar of rice into the pot, and adding 2 jars of water, sets us up for a breakfast and dinner (and possibly a night snack of rice pudding one night as well).

    The second idea, one I really love, is storing our rice in these 750 ml jars. I write the ratio of rice to water and cooking time on a round label* on the lid , so I don’t have to keep the packaging. I store two or three jars in the pantry, so I can just grab a jar, pour it in the pot, and use that same jar to add two parts water before turning it on. Once it’s cooked, I divide it into glass tupperware and it goes in the fridge already separated. Done. The better part (or, well, at least the substantial part) of two meals for a family of six!

    *I always have a stash of these labels kicking around – they are the best. I use them for jar labels, gift bags, for the kids to make stickers, etc.

    How do you save time and energy during your week of preparing and enjoying meals? Share your ideas, thoughts, and questions in the comments.


    This post was shared as a part of Natural Living Monday, Thank Goodness It’s Monday, Fat Tuesday and Simple Lives Thursday, Fight Back Friday, Unprocessed Fridays, and Simply Natural Saturdays.

  • Calendula Banana Muffins

    Calendula Banana Muffins

    tiny peasant calendula banana muffins     tiny peasant calendula muffins buttertiny peasant calendula muffins sugar tiny peasant calendula muffins eggtiny peasant calendula muffins calendulatiny peasant calendula muffins greasetiny peasant calendula muffins spreadtiny peasant calendula muffins buttered

    Our go-to muffin recipe, Choco-Banano Muffins are always a hit. It’s a recipe that has been shared among friends time and time again and is based on a banana muffin recipe from The 250 Best Mufffin Recipes by Esther Brody. This past week, since we were learning about Calendula, we adapted the recipe to be Calendula Banana Muffins. They were fantastic! We all hope you enjoy them as much as we did. Feel free to sub gluten free flour without making other changes – they turn out really well for us.

    CALENDULA BANANA MUFFINS

    Ingredients

    :: 2 cups spelt flour

    :: 1 cup unrefined sugar, such as sucanat or panela (we use a bit less than a full cup)

    :: 1 egg

    :: 1/2 cup butter, coconut oil, or applesauce

    :: 1/2 cup dried calendula flowers

    :: 2 ripe bananas, mashed

    :: 2 tablespoons milk of your choice

    :: 1 teaspoon (tsp) salt

    :: 1 1/2 teaspoons baking powder

    :: 1/2 teaspoon baking soda


    Instructions

    1. Beat together the butter, sugar and egg until well incorporated.

    2. Using a mixer or wooden spoon, add in and mix the mashed bananas, milk, vanilla, baking soda, and baking powder, followed by the flour and chocolate chips.

    3. Scoop into greased muffin tin, filling 2/3 full.

    4. Bake at 350F for 20 minutes.

    5. Cool for five minutes before removing from tin and placing on a cooling rack. Enjoy!


    This post was featured on Girl Meets Nourishment, and shared as a part of Natural Living Monday, Thank Goodness It’s Monday, Fat Tuesday, and Simple Lives Thursday, Unprocessed Fridays, Fight Back Friday, and Simply Natural Saturdays.

  • The Week in Photos

    The Week in Photos

    snowshoe bros    on a puzzle kickzebra puzzlebre castle logixpirate cove logic gamereading about robotswrapping some drawings for daddyposter for dad

    Another week of our living and learning journey. I often hear that this time of year can be the worst for wanting to quit. I’m thankful that we are all still firmly IN this journey, and though there are daily hiccups, we are happy with and thankful for our chosen path.

    A few things we were up to this week:

    :: A short snowshoe trip through the little forest in a nearby park, followed by an adventure on the snow-covered play structure and some hot cocoa.

    :: Spotting beautiful blue winter berries on our forest trail.

    :: The start of a new project for a six year old who is ready to answer his curiosity about electricity – and, ahem, also monopolizing my phone as he takes photo after photo of objects in our home that run on electricity and battery.

    :: Lots of puzzle making, in particular by our three and ten year olds.

    :: A couple of the kids got out the logic puzzles – Pirate’s Hide and Seek and Camelot Junior – that are so loved around here. Such a fun, sometimes frustrating, and always rewarding challenge.

    :: Cuddled brothers reading about robots.

    :: Wrapping litte drawings to gift to daddy just for fun.

    :: Making a big table-top poster of drawings for daddy. Because he is “the best daddy”.

    :: Creating new friendships and celebrating old ones at our homeschool co-op.

    :: Learning about the healing properties of calendula through a magical tale of friends and fairies – and making delicious banana + calendula muffins.

    :: A new session of daytime swimming lessons, with friends in each child’s class.

    :: Lots of messes, some cleaning. Lots and lots of conflicts, resolutions, laughter, learning, and love.


    Please note that we are a part of the Amazon associates program. If you visit Amazon.ca through a link on Tiny Peasant and make a purchase, our family will receive a small percentage of the sale. The products that I specifically recommend in blog posts are products that we love in our home – if they aren’t they are on my wish list and I will note that. Our bookshop (coming soon) has a mixture of tried and true, and wish list items. If you ever have any questions about a product we link to, please don’t hesitate to ask! Thank you for your support! 


  • Simple Kids’ Sports Bags

    Simple Kids’ Sports Bags

    Tiny Peasant Cleat Basket
    Sports Bags Button
    Tiny Peasant Sports Bags Button
    Getting Gear Out Tiny Peasant Sports Bags

    With a mountain of snow in view out my window, I received an email the other day about children’s soccer. Already? It seems early, but it is true that organizing all those little people into teams is no simple task and one that warrants a good deal of prep time.

    With the soccer email, I was reminded of some photos I wanted to share with you that were taken years ago, and now seems like the appropriate time. If you’re like us, it seems to take a millennia to get the kids dressed and ready, gather snacks, water bottles, a picnic blanket, and game gear and get out the door. One way we tackle this problem is to keep our gear in special bags, hanging on hooks right by the door.

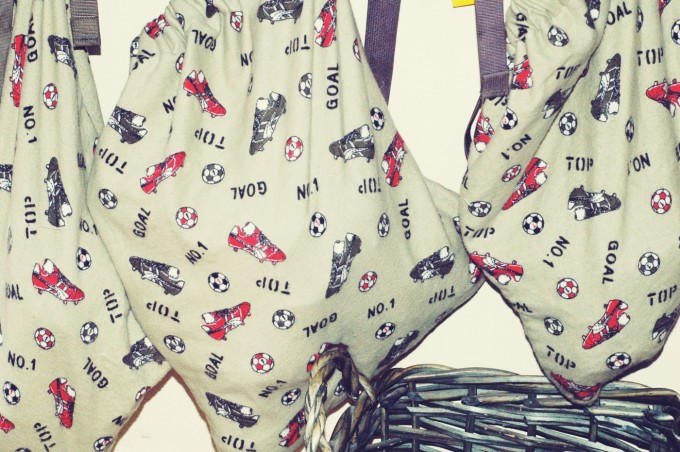
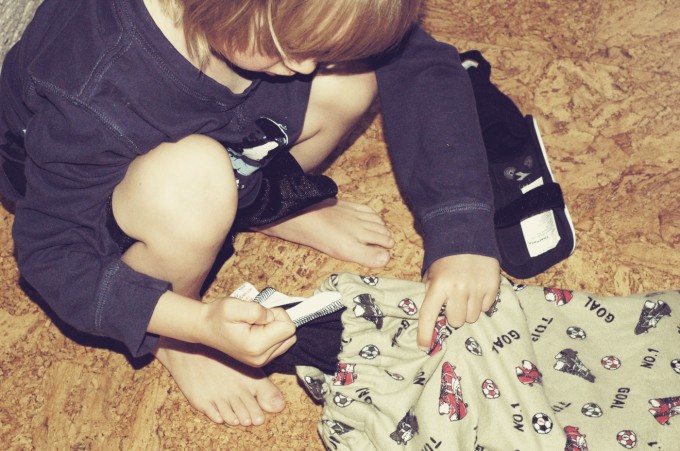
    A few years ago, we stitched together some soccer themed fabric into simple pouches with elastic openings and a loop handle. Cleats, shin pads, jerseys, and shorts, and possibly a water bottle or hat stay in this bag aside from when they are being used or washed. This really plays into the whole concept of creating rhythm in the home, as the kids know what to expect. They don’t have to wait for the adults or go on a scavenger hunt to find their gear. They just know. They know where their bag is, and that their stuff is in it. So when it’s time to get ready for soccer, they each go to their hook, grab their bag, get dressed, toss their water bottle in, and head out the door. I feel this really ties in with the Montessori view of a prepared environment – with a place for everything and everything in its place. If only we could get there with all of our lego!

    Dirty cleats are tossed in a basket that is kept under the bags, so they’re still all in one place, but not getting dry mud all over the floor.

    You can apply this idea to any kind of sport or activity that doesn’t require a large amount of equipment – swimming lessons, dance or martial arts class, baseball, etc.

    Now is really the perfect time to whip these up, so you’ll be enjoying gardening or other outdoor activities come April.

    Instructions

    I’m not a pattern-maker, or much of a pattern user, for that matter.  I didn’t use a pattern for these bags and thankfully the kids are quite forgiving – or just not that focused on the fine details of sewing construction.  I’ll try my best to outline the steps I took here:

    1. Cut out a long strip of fabric, double the desired height, folded in half – wrong sides out.

    2. Cut a piece of strapping or rope for a handle. Fold it in half and insert and pin between the two layers of fabric, about 4 inches from the top (without hem), keeping in mind you’ll need to fold the fabric over for the hem. So just judge where you’d like the handle to be.

    3. Stitch up the sides of the bag.

    4. Make a hem with an opening to run an elastic or drawstring through. I used a piece of elastic probably about 4″ shorter than the diameter of the opening. This was so the kids’ gear wouldn’t fall out, but it would still be easy enough for them to get things in and out of the bag – and not have to use a drawstring or tie of any kind.

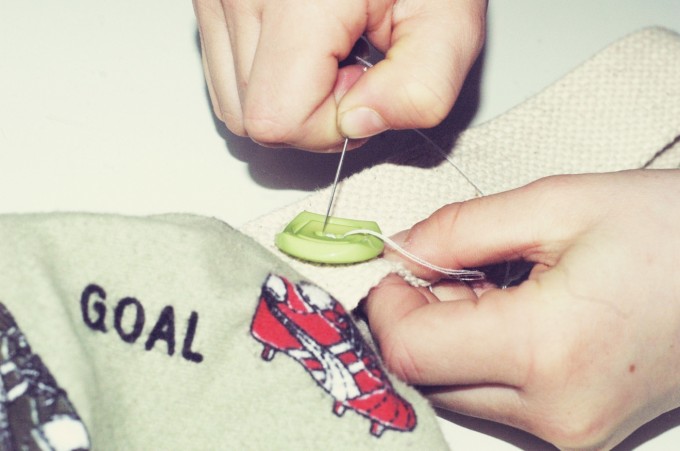
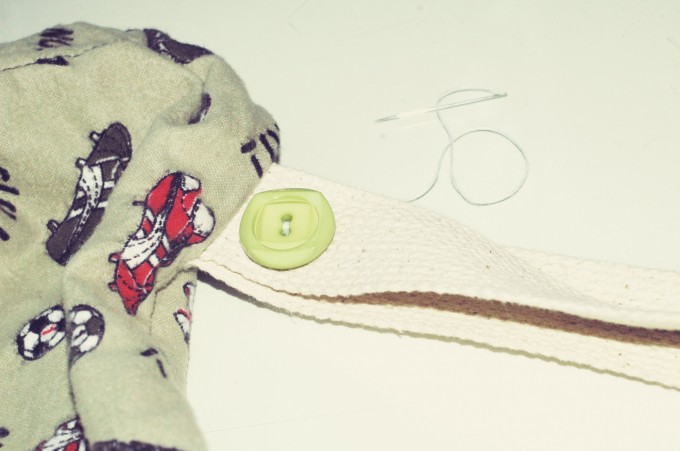
    5. Because we had three children playing soccer at once, each of them chose and stitched on a button from our stash, so they can easily identify which bag is theirs.

    If my instructions are as poor as I imagine, you can use a pattern such as this one, for a simple drawstring pouch, and use the drawstring or an elastic. Just add the handle loop before stitching up the sides, if you use elastic in the hem. If you use a drawstring, the string becomes your handle.   

    If you have any tips for staying organized for the sports season, please share the in the comments!


    This post was shared as a part of Simply Natural Saturdays, Montessori Mondays, Natural Living Monday, and Thank Goodness It’s Monday.

  • The Week in Photos

    The Week in Photos

    A collection of photos from our week of living and learning together. Feel free to share a link to your own post or share about your week in the comments…

    In no particular order (because I really want to get back to hanging out with these cute kids instead of hemming and hawing over this!):

    The image above shows our almost seven year old doing chin ups in the closet. There is usually a wooden doll house in there, but this works, too! A post on the many ways we’ve used closets – for anything but clothes – in our home is brewing.

    crochet couch jumping
    A calm, focused crochet project, alongside a rambunctious duo of couch jumpers. Yes, our Christmas tree is still up – we’re taking it down today and working on some of these projects this week.

    homemade cards war
    A set of homemade ‘funny character’ playing cards. Work like a charm for a game of war.

    playing dolls
    Playing dolls and practicing diaper changes.

    preventing colds
    Nourishing teas.

    clean pantry
    A freshly organized pantry has the same effect on me as going to a spa… well, almost.

    puzzle with a friend
    Ambitious puzzle project with a friend.

    shadow figures mshadow figures
    Shadow figures.

    story telling cards
    The kids got out a story-telling game and worked with it for about an hour all on their own.

    dose of elderberry
    We made some homemade elderberry syrup to combat the sniffles.

    pony bead crafting
    Pony beads – a side project that gets revisited now and then.

    reading a BOB
    Reading time. We don’t have a set reading time – when the kids or I think of it, we cuddle up and the kids read between one and four of these BOB Books, depending on their mood and interest.

    reading time
    Reading time is often in conjunction with coffee time, of course.

    shadow bridge
    Walking across the shadow bridge.


    Please note that we are a part of the Amazon associates program. If you visit Amazon.ca through a link on Tiny Peasant and make a purchase, our family will receive a small percentage of the sale. The products that I specifically recommend in blog posts are products that we love in our home – if they aren’t they are on my wish list and I will note that. Our bookshop (coming soon) has a mixture of tried and true, and wish list items. If you ever have any questions about a product we link to, please don’t hesitate to ask! Thank you for your support! 

  • Elderberry Syrup

    Elderberry Syrup

    It was bound to happen sooner or later – one of the kids has a cold. Aside from the rare sniffle or cough, we have been healthy all fall and winter – with much credit, I think, to the many healing drinks (see some here, here, and here) and nourishing foods (see some here and here) we’ve been enjoying.

    I suppose because we haven’t felt a great need to, I haven’t made elderberry syrup yet, though I’ve had elderberries from this wonderful herbal establishment for months. Today our little one’s sniffles signalled that it would be a great time to make some.

    After searching online a few places, I ended up making a simple recipe based on the amount of dried berries we had on hand. I added some foraged rose hips since we didn’t have many elderberries!

    elderberry syrup ingredientschocolate elderberry syrup tiny peasant

    Ingredients:

    • 1/3 cup dried elderberries (I wasn’t planning to write a post when I started making the syrup, and neglected to take a picture of the dried elderberries. You can see them in the second photo, which is of our chocolate elderberry syrup ingredients).
    • 3 tablespoons dried rose hips
    • 1.5 cups water
    • 1 teaspoon cinnamon
    • a bit of grated ginger or just a 1″ piece of ginger, peeled
    • 2-3 tablespoons honey (vary depending on how sweet you’d like your syrup)

    Directions:

    1. Add the water, elderberries, rose hips, cinnamon, and ginger to a pot.

    2. Bring to a boil, and then simmer on low for 30-40 minutes.

    3. Using a sieve, strain and mash the berries, getting out as much goodness as you can!*

    4. Once the syrup is still warm, but not hot, add the honey.

    5. Pour off into a canning jar or bottle and use as needed. Store in the refrigerator.

    Note: After I strained my syrup, I was staring at the berries and wondering how to extend them – if I could get another, smaller, batch of syrup. Then Brittany from The Pistachio Project tweeted a great idea for getting more out of the berries. Perfect.

    Optional: We LOVE adding star anise to our syrup, and keeping it in the jar or bottle in the fridge so that it tastes more and more like licorice each day!

    Alternate: We’ve also made chocolate elderberry syrup which is delicious for pancakes, waffles, etc.

    bottling elderberry syrup copystraining elderberry syrupbottled elderberry syrup


    This post was shared as a part of Simply Natural Saturdays and Simple Lives Thursday.

  • How to Make Hummus

    How to Make Hummus

    The most loved hummus around these parts is sun-dried tomato hummus. The sun-dried tomatoes lend such a lovely and deep flavour, making it a nice dish to bring along to a potluck, or to use for simple lunches and snacks.

    tiny peasant hummus banner

    Ingredients

    • 2 cups soaked, cooked chickpeas (head over here for info on how to soak, cook and freeze dried chick peas)
    • 6 sun-dried tomatoes (we prefer rehydrated dry, rather than in canola or another vegetable oil)
    • 2 cloves garlic (this is mild enough for our kiddos – adjust to your family’s preference)
    • 1 teaspoon sea salt (much more shown in the photo!)
    • 1/4 cup extra virgin olive oil
    • 2 tablespoons lemon juice
    • 1 tablespoon tamari soy sauce


    Directions

    1. Put all of the liquid ingredients into your blender or food-processor, followed by the dry ingredients, ending with the chick peas.

    2. Blend the ingredients together until desired consistency is reached.

    3. If desired, swirl some extra virgin olive oil in a dish with the hummus, and enjoy! Any extra hummus can be stored in the fridge for short term eating or frozen for use later on.

    hummus ingredients in blenderchick peas blenderhummus lovin'hummus lovin crew 


    This post was shared as a part of Natural Living Monday,  Thank Goodness It’s Monday, Fat Tuesday,  Simple Lives Thursday, Unprocessed Fridays, Fight Back Fridays, and Simply Natural Saturdays.

  • How to Soak, Cook + Freeze Dried Chick Peas

    How to Soak, Cook + Freeze Dried Chick Peas

    Chick peas, or garbanzo beans, are an affordable, protein-rich, high-fibre legume, that are also a great source of iron, B-6, and Magnesium. That said, purchasing canned chick peas can be much less cost effective than making your own at home from dried ones purchased in bulk.

    Don’t miss our recipe for tasty sun-dried tomato hummus!

    How to Soak Chick Peas

    First, if you’re wondering why it’s a good idea to soak legumes before eating them, there’s some great info here and here. Both of these posts also outline more info on how to properly soak legumes.

    1. Rinse your dried chick peas. Remove any broken pieces, off-looking pieces, stones, etc.

    2. Place the rinsed chick peas in a bowl or glass tupperware container and cover with warm water to double the height of the chick peas. Add 1 tablespoon of lemon juice or apple cider vinegar per cup of chick peas. Set on counter overnight or for 12-24 hours, or up to 36.

    *Kelly, from the Nourishing Home, skips the acid medium (lemon juice or apple cider vinegar) as it can impact the flavour and texture of the legume. Try it both ways, and see what you like best!

    3. If you are not soaking overnight, rinse and add more water to the chick peas every few hours, or at least once part way through the soaking process.

    4. Following the soak, strain and rinse the chick peas before cooking.

    soaked strained chick peas


    How to Cook Chick Peas in a Crockpot

    1. Place in your crockpot and cover with 2-4″ of water. Set on low, and cook for roughly 8 hours, or until tender.

    2. Strain and rinse the chickpeas. Reserve whatever amount might be required for a recipe that will be made soon, and freeze the rest.

    chick peas crock pot

    How to Freeze Chick Peas

    We love to freeze cooked chick peas in 500ml canning jars, particularly because our favourite hummus recipe calls for 2 cups of chick peas! It’s also a great amount to add to a soup or stew.  Just place cooked, rinsed beans into glass canning jars, leaving some space at the top of the jar, seal, and freeze.

    mason jar chick peas


    For more tips on eating well affordably, check out this post: Fitting Real Foods into the Budget – tips from myself on eating REAL food on a budget and links to some of my favourite posts on this topic.

    real food budgeting roundup


    For time and sanity saving menu planning help, grab our Tiny Peasant Menu Planners & Resources!

    Tiny Peasant Pantry Menu Planners Badge


    This post was shared as a part of Natural Living Monday, Thank Goodness It’s Monday, Fat Tuesday, and Simple Lives Thursday, Unprocessed Fridays, Fight Back Fridays, and Simply Natural Saturdays.