Blog

  • Advent Week 1 Activity :: Growing Crystals

    Advent Week 1 Activity :: Growing Crystals

    A fun activity to learn about crystals as part of Advent Week 1 :: The Light of Stones and the whole Tiny Advent series. I love how this activity mirrors the anticipation of Advent. How the children carefully prepare, and then wait, and watch for transformation and beauty.

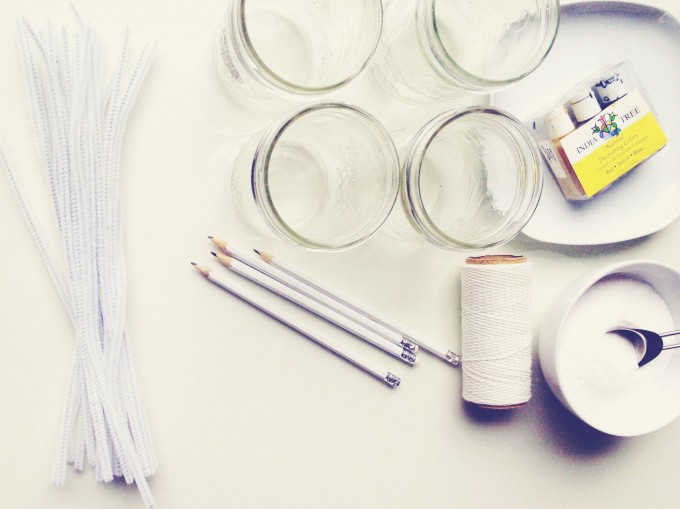
    Materials

    • wide mouth canning jar
    • string
    • pipe cleaners (we used white this time, but later this week, we’ll try other colours)
    • pencil
    • borax, salt, or sugar
    • boiling water
    • food colouring, if desired

    growing crystals supplies2

    Directions

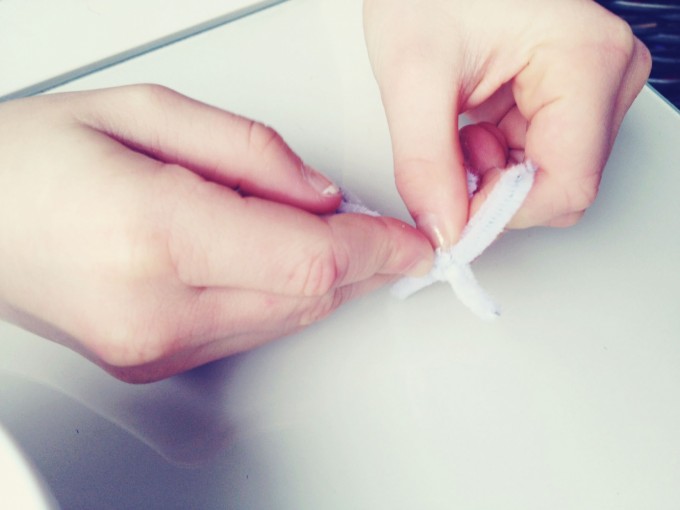
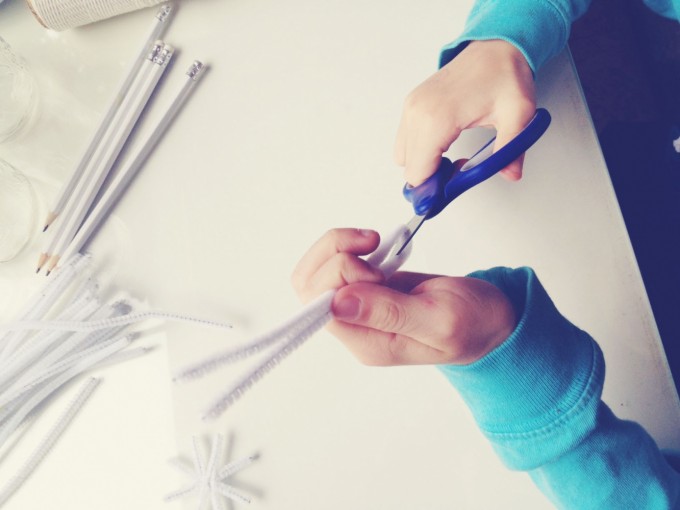
    1. Make a shape out of the pipe cleaner – this could be a snowflake shape, a star, a cross, or whatever your child would like.
    crystals - cuttingcrystals -make a shapecrystals - cut pipe cleaners

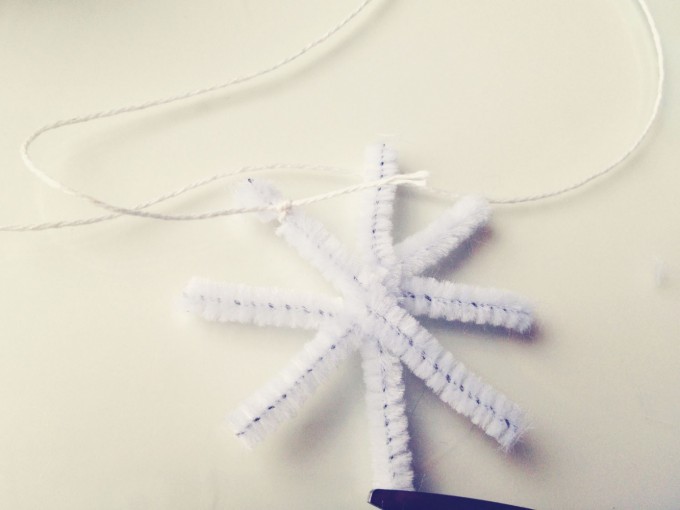
    2. Tie the shape onto one end of the string, and tie the other end of the string around the pencilcrystals - snowflake
    3. Pour 1 – 1.5 cups of boiling water into the jar, and stir in food colouring, if using (we tried to make ours yellow, but we only had a few drops of colour left).

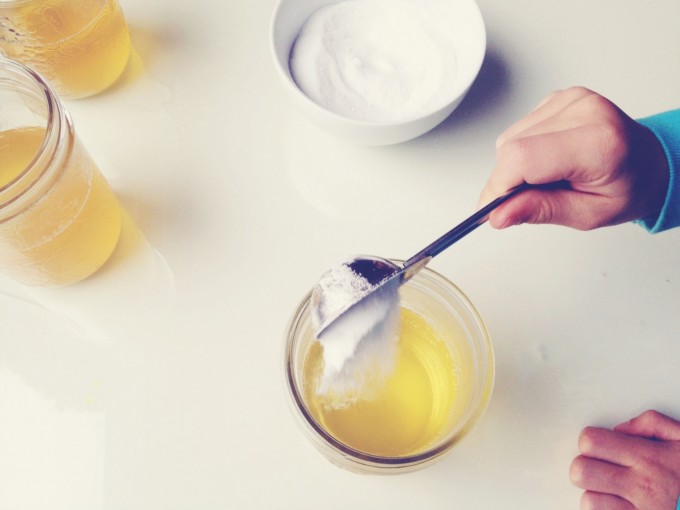
    4. Add 1 tablespoon of borax (or salt or sugar) at a time and stir to dissolve, until you have added 3-4 tablespoons. Update: Though our experiment worked okay with this amount, others have mentioned that it wasn’t as good for them. I have done a bit more research and have read up to 2/3 cup of salt or borax per cup of water. Experiment away, friends!
    crystals - borax

    5. Lower the pipe cleaner shape into the jar of solution, taking care to ensure it isn’t touching the sides or bottom of the jar.
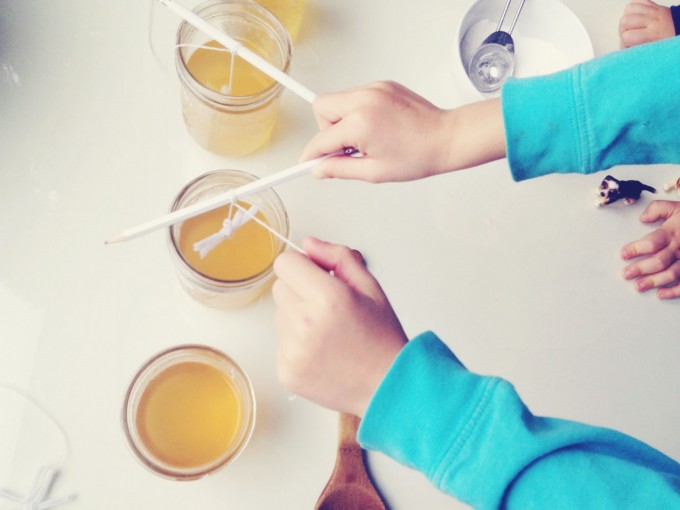
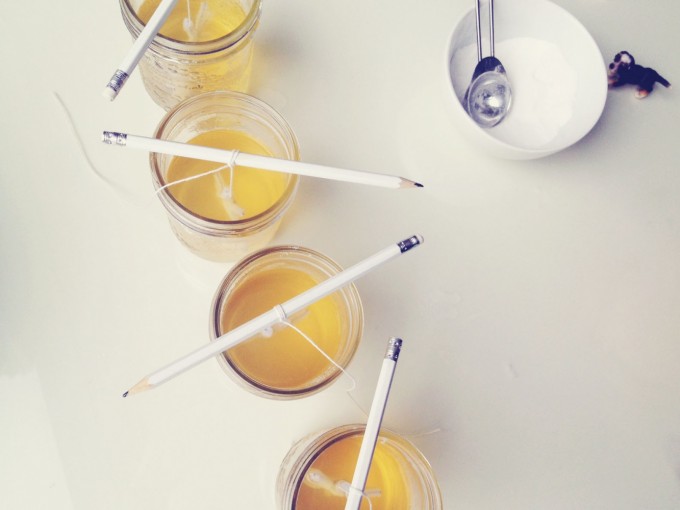
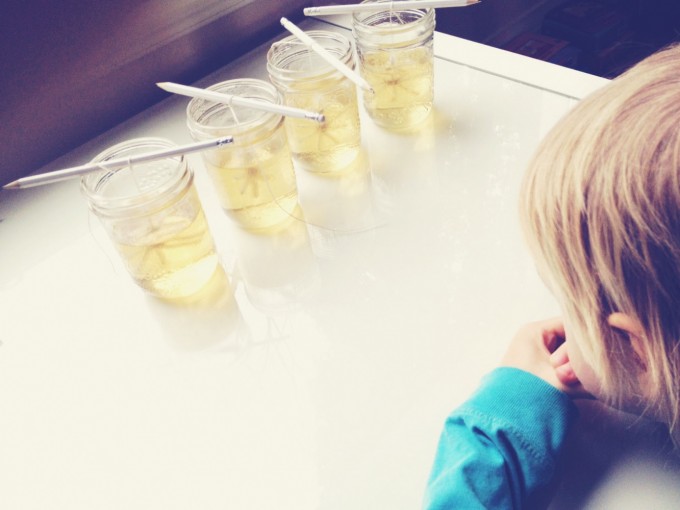
    crystals - lower in snowflakescrystals - now we wait

    6. Set the jar aside and set a timer to check on it now and then so you can watch the process of the crystals forming.crystals - now we wait 2crystals - and we watch
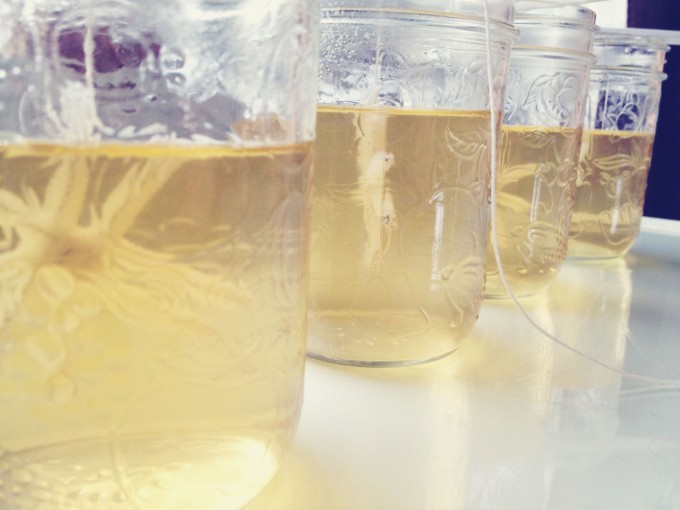
    7. Once your crystals are big enough, remove the string and shape from the jar, dry, and hang in a window to catch the light. I couldn’t get a decent photo in the window, but they are hanging there now as per Milo’s specific instructions regarding which window, and how high they should hang!
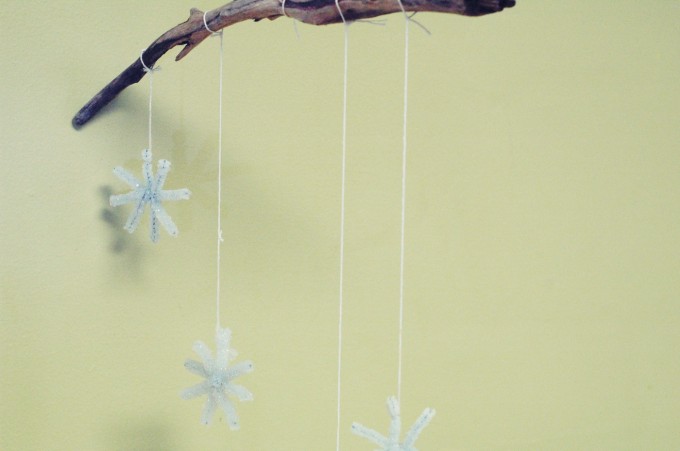
    branch crystals


    This post was shared as a part of Simple Lives Thursday, Simply Natural Saturdays, and Montessori Mondays.

  • Dressember :: Day 3

    Dressember :: Day 3

    Today another lady in our house decided to join in the campaign! She is going to do a photo a day as well, and help spread the word about this project with her grandparents and friends.

    A little bit about my dress today… it was made by the lovely and very talented Melanie Wesley. We did a logo and other design work for her and did a partial barter, which included the yellow dress. We went to the fabric store together, and I selected the bright yellow linen that she then transformed into the sweetest dress. I wear it a lot. Melanie was the one who pointed me to the Uniform Project and I was so inspired to have a piece to wear often and love much. If you’re in Manitoba, look her up, or anyone can find her on Etsy where she often has gorgeous hand-crafted stuffed bunnies and dolls. When it comes to artisans, she is the real McCoy.

    dressember 3

    melanie wesley logo


  • Dressember :: Day 2

    Dressember :: Day 2

    Today I officially joined Dressember and have my own campaign page that you can donate to directly if you choose to. I love this campaign for the spirit of fun and togetherness – and the challenge for those who have a limited wardrobe to wear a dress each day for a month!

    A favourite project that might help out those who are participating is The Uniform Project. Sheena designed and wore one black dress (well, actually a few copies of it for practical purposes, but it’s still amazing) for 365 days to raise money for The Akanksha Foundation, a non-profit working for education for children in India.

    Check out this video where you’ll find 365 ideas for wearing just ONE dress in different ways. Now we truly can’t say that we can’t do Dressember because we don’t have enough dresses for a whole month!

    Don’t forget to share a link to your dress for today in the comments, or just tell us what you chose…


  • Dressember :: Day 1

    Dressember :: Day 1

    Thanks to a friend from Winnipeg who is participating in this fundraiser, it came across my path in time for me to start right on December 1st. Dressember is a campaign that raises funds to help children and women who are exploited as victims of  slavery, sex trafficking and other forms of violence.

    Consider joining in on this campaign, or making a donation! Each day I will post a photo of my dress, and if you’d like to join in (whether you’re officially participating or not), please link to a photo in the comments!

    There is a giveaway (or two) in the works for those in Manitoba who are participating in the campaign… stay tuned for details!

    Peace to you and yours,

    Kris


  • Craft Sale Week

    Craft Sale Week

    This is one of the busier weeks in our year as we all help to prepare for my table at the Winnipeg Centre Vineyard Craft Sale, where I sell Tiny Peasant kits for kids, cards, and Urban Peasant neckwear. The kids know that during Craft Sale Week, they get to be my elves, and after the sale, I am their elf to help with all of their Christmas crafting.

    Our homeschooling looks somewhat different during this week, with a lot less structure offered by me. I sort of panicked, thinking that I was abandoning ship and the kids would sink. Well, they are not only surviving but thriving. They have their own craft stations set up, making pony bead creations, finger knitting, crocheting, with breaks to build elaborate block towns, catch up with their lego characters, play house, draw, read a book, work on a project, play a game or head outside to play in the snow.

    I’ve had offers from little ones who would like to man the yarn swift, and they all helped to sort out wool for the Tiny Weaver kits, and weigh roving for the Tiny Felter kits. So much elving going on around these parts and it is truly fun to do alongside the kids.

    The way they have embraced this independence is amazing – there are no complaints of boredom, to be sure. Today one of them said to me, “The thing I love most about my life is that I can draw whenever I want!” All of this is a great reminder to me that I don’t have to have every moment planned. That they need me to hold space for them to direct their own learning, to fulfill their own needs for creativity, role playing, and decision making. And I can hang out in the wings (busily crafting) and be ready with snacks, with hot cocoa when they come in from play, to support conflict resolution when needed, and reach their halloween candy down from on top of the fridge. Ahem. The candy fairy doesn’t take all of that candy, you know!


    using the swiftblock townstory projectroving scalepony beadsmorning yoga

  • The Week in Pictures

    The Week in Pictures

    Some snapshots and notes from the week. Let us know what you did this week in the comments – share a link if you have a post about it.


    There is really nothing like a warm casserole full of the kids’ great-grandma’s rice pudding. So warm and nourishing on a cool fall day. Especially with a mug of chai tea during tea + story time!

    rice pudding gran's dishes


    As we prepare for the big craft sale we do each year, Mike and the kids went out hunting in the trees by the riverbank for branches for one of the Tiny Peasant craft kits. Photos by Mike.

    river walk 3 river walk 2


    Continuing on with the season’s pumpkin love, we set up a station with pumpkin books, cards with the life-cycle of a pumpkin, orange painting, and an orange tones pom-pom sorting activity.

    pom pom pupkin sorting pumpkin painting


    The usual reading nook cuddles took place, as well as enjoyment of a new math game called Tenzi. Finger placement assuredly unintentional! Ahem.

    reading nook 2 reading nook tenzi


    There’s one little elf starting on Christmas gifts, and gifting some a little early as well. I guess I should get out the fabric gift bag stash so he can stop using kleenex…

    little elf 2 little elf


    I’m in the water with Milo and Breann during their lessons, so don’t have photos of them yet, but got one shot of Cohen’s lesson. We are so thankful to have daytime swimming lessons set up by the pool specifically for homeschoolers, and for a grandma who joins us each week!

    swimming lesson


    Sweet treats for tea + story time this week! The kids loved dipping the pretzels in the chocolate (made with dark cocoa camino baker’s chocolate, coconut oil, and honey).

    chocolate pretzel love chocolate pretzel tea love


    We couldn’t have asked for a more beautiful and refreshing end to our week than this nature walk through a local natural area. The kids had a blast climbing, running and harvesting rose hips with their friends. I was carrying the messenger bag as we reached the park shelter where a group of dog owners were gathered visiting. A couple folks motioned toward me and asked if we had found anything. I eagerly pointed to the bag and said that yes we had found a lot of rose hips! The woman looked at me a little funny and said she meant with the metal detector I was also carrying. I guess not everyone is as excited about wild edibles as we are!

    Not sure what we’ll use our rose hips for yet. Maybe this rosehip ginger beer, or this rosehip spread if not just dried and used in teas or made into a syrup with elderberry. If you have any suggestions, please share them in the comments.

    kids climbing nature walkcollecting rose hips rose hip goodness


  • This Moment

    This Moment

    “A Friday ritual. A single photo – no words – capturing a moment from the week. A simple, special, extraordinary moment. A moment I want to pause, savor and remember.” {joining Soule Mama today}

    If you’re inspired to follow along, please leave a link to your moment in the comments!

  • Heirloom Offerings :: Rice Pudding

    Heirloom Offerings :: Rice Pudding

    This offering to Heirloom Offerings :: The Grandma Project was contributed by Kris Antonius. Are you interested in sharing? Read our submission guidelines and get started.


    It’s almost effortless to conjure up the sweet aroma of grandma’s rice pudding baking in the oven. It was a smell that occupied her entire home, and still occupies my memories. Thanks to my grandma and my mom, my little ones will grow up sharing this memory, but in the context of our home.

    Little has changed in how we make our rice pudding, from the original that was enjoyed in grandma’s kitchen so often years ago. She baked; we cook it on the stove top most of the time. She added eggs; we have a little one with an egg allergy, so unless we make two dishes, we go egg-free. A few tiny subs or additions here or there, depending on the day – but in the end, it is still the warm, homey, comforting dish I recall from my childhood.

    What’s great about rice pudding is that if you’re not using refined sugar, if makes a wonderful dessert or breakfast. We’ve even had it for lunch. And snack. It’s just that good. Especially when it’s made in Gran’s casserole and eaten out of her fancy dishes.

    rice pudding gran's dishesrice pudding and chai tea


    Grandma Amey’s Rice Pudding

    Ingredients (our updated substitutions in parentheses)

    • 3 cups cooked rice (organic whole grain brown or wild rice)
    • 1 apple, chopped (unpeeled)
    • 1/2 cup raisins (organic)
    • 1 1/2 cups milk or cream (organic milk or cream, or homemade almond milk)
    • 1 egg (from a local farm)
    • 1 teaspoon vanilla
    • 3 tablespoons sugar (honey or panela)
    • 1/2 teaspoonCinnamon

    Our Additions:

    • Virgin coconut oil or coconut butter
    • Sometimes a combo of: sunflower seeds, almonds, walnuts, hemp seed


    Instructions

    As far as I recall, Grandma never used a recipe. She simply made a pot of rice, and added the other ingredients by sight or intuition. I don’t think she ever heard a complaint! 

    1. Cook rice according to instructions (or use leftover rice – I often cook extra rice when making a meal for this purpose)

    2. Chop the apples. Grandma would have peeled them. We leave the peel on.

    3. Mix the rice, apples, raisins, milk, egg, sweetener and cinnamon in a casserole dish and bake in the oven at 350 for 30 minutes.

    OR

    Place the rice, apples, raisins, milk, egg, sweetener and cinnamon in a pot and heat on medium-low for 15-25 minutes.

    4. Serve warm or cold with fresh milk or cream or a dollop of real whipping cream.


    Kris Thumbnail

    Kris Antonius has a crew of four budding gardener chefs, ages 3, 6, 10, and 13, and is passionate about good food and learning. She enjoys exploring sustainable farms, food, and recipes with her family and nurturing the seeds that are planted on their numerous food and learning adventures.

    *Photo of Kris by Pauline Boldt.


    For more tips on eating well affordably, check out this post: Fitting Real Foods into the Budget – tips from myself on eating REAL food on a budget and links to some of my favourite posts on this topic.

    real food budgeting roundup


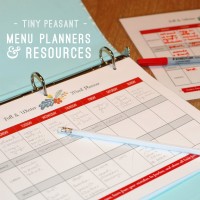
    For time and sanity saving menu planning help, grab our Tiny Peasant Menu Planners & Resources!

    Tiny Peasant Pantry Menu Planners Badge


    This post was shared as a part of Thank Goodness It’s Monday, Natural Living Monday,  Fat Tuesday, Real Food Wednesday,  Simple Lives Thursday, Unprocessed Fridays,  Fight Back Fridays and Simply Natural Saturdays.
  • Writing with Kids :: Everyday Writing

    Writing with Kids :: Everyday Writing

    Around these parts, writing is part of the fabric of the everyday. Below are two ways that writing happens in our home – the first is more  of an ‘assigned’ type of writing that is part of our homeschool, and the second is very much something that happens in the spur of the moment (or if it happens too late, in frustration and tears).


    Gratitude Journals

    The other day a blogger shared a photo of a wise quote they have in their home. Start each day with gratitude. Yes. In the summer I purchased lined notebooks that I planned for use as gratitude journals. As with even the best laid plans, ours went astray, and it was only in November that we took pencil to our journals and jotted down words of thankfulness. We are following along with Ann Voskamp’s monthly Joy Dares, though to keep it simple, we write down one rather than three gifts we are thankful for each day. We also modify to make the ideas a good fit for our family and for the age range of our little ones. I love using Ann’s lists, as they prompt us and remind us of the breadth of things we have to be grateful for.

    gratitude journal


    Reminders

    One of the best ways we’ve found to diffuse an upsetting situation where one of our children really wants to do something and there isn’t time left in the day, is to offer up the idea to write down a reminder. Even at age 3, these reminders worked wonders. The tears dried up as the pencil worked the paper, drawing a bicycle to be ridden the next day, or a slide that is waiting to be slid down. We place the reminder in a spot where we’ll see it and we take care to honour their act of recording their wishes. This simple act of writing allows kids to see that their needs are recognized, and their feelings honoured. It empowers them and calms them. I do hope that it will work for your little ones as well.

    Though one of our littles ones writes reminders often, I couldn’t find a lot of them around the house or in our memory boxes. The photo below is the only one I could find and was written by our son when he was about 4 years old. He wrote the first thing he wanted to do on the weekend out as a word – tobogganing – and then drew scootering and hockey.

    to do tomorrow


    Check out the first part in the Writing with Kids series, DIY Writing Stations.

  • Writing with Kids :: DIY Writing Stations

    Writing with Kids :: DIY Writing Stations

    Lots of people ask me what method or philosophy of homeschooling we practice around here. Our learning journey is inspired by bits and pieces of many philosophies, ultimately landing us in the eclectic realm.

    This is quite true of our ‘writing class’, as we don’t actually have one – though we sometimes write specifically as part of our home learning, much of our writing comes by way of life in general. Writing goes on in many places around these parts – in bed, on various bits of floor, at the dining table, in a closet nook, in the car. We write checklists, wish lists, notes, reminders, instructions, and more.

    One of our favourite spaces is our writing station, with thanks for the specifics of the idea to Meg of Sew Liberated – a wonderfully inspiring mama and artisan. If the kids want to write a letter or craft a special card, they’ll often be found at the writing station that is stocked with blank cards, envelopes, rock crayons, pencil crayons, pens, craft stamps, and of course postage stamps. The thing that I am most thankful to Meg for is the idea to have a binder with pre-written mail labels, so the kids can find the name (and photo if you are more organized than me!) of their friend or family member and simply peel off the label and stick it on in the appropriate place.

    tiny writer stationerytiny writer station

    Simple cream coloured lined paper strips that hang on the wall next to the station were perfect for writing the alphabet in upper and lower case for quick reference while in the midst of letter writing goodness.tiny writer alphabet

    When the kids are ready to mail their letter, they can find the address label for the recipient as well as a return address label. We pre-write our address on the labels, and leave a space for them to fill in their own name, so they can customize it a bit and be more involved in the process without having to write out the entire address.

    tiny writer rock crayonsletter writing station stamp

    To help guide the writing process for our little ones, we have also created a set of  Tiny Writer printable sheets. There are sheets for a variety of levels, from a full letter with address up top, salutation, body, and closing – right down to a sheet with a space for the author’s name, a drawing, and their special finger-print signature. Included is a handout with one page of writing prompts with ideas for what to explore in your letter, and one page with questions to ask your recipient. These can be kept handy in a binder or on a clipboard, or can be cut out and placed in a jar. We cut ours out and to tell the difference between topics and questions, we coloured our question slips yellow. Please feel welcome to download the handouts for your own use.

    tiny writer promptstiny writer station goods

    tiny writer writing printablesletters to lions

    We used the Tiny Writer printables for a fun project over at National Geographic called Letters to Lions.

    Apologies for the poor photos – the lighting in the writing nook is not great. The upside is it made me realize we should get a light for this space!


    Screen Shot 2013-11-09 at 1.35.49 PM


    This post was shared as a part of Thank Goodness It’s Monday, Montessori Monday, and Simply Natural Saturdays.