Month: December 2013

  • The Best of 2013

    The Best of 2013

    Thanks so much for joining me on this journey. Below are 13 of the most popular posts from 2013 – out of just under 100 posts!

    If you have a favourite post from the blog, even if it’s not featured here, share it in the comments. What topics do you want to see more of this coming year – or what new topics should we introduce in 2014?


    FOR THE LITTLE ONES + THE HOME

    1. Growing Crystals 

    growing crystals supplies2

    2. Homemade (pumpkin spice) Playdough

    pumpkin play dough cut outs

    3. Celebrating Halloween Mindfully

    Halloween Crafts Banner

    4. Advent in the Heart + Home

    advent 2013 badge

    5. The Great Christmas Tree Dilemma + Recipes for Pine Needles

    christmas tree dilemma badge


    FROM THE PANTRY

    6. Simple Frozen Soup Packs

    chopped soup veg

    7. Simply Healthy Fudge

    candy cane fudge ingredients

    8. Heirloom Offerings :: The Grandma Project – Get Frugal with Fat

    kris grandma project fat

    9. Nourishing Hot Cocoa 

    photo 3

    10. Heirloom Offerings :: The Grandma Project – Rice Pudding

    rice pudding gran's dishes

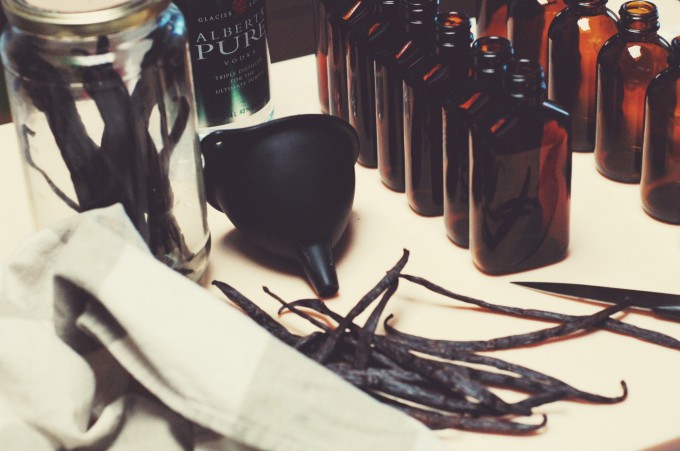
    11. How to Make Vanilla 

    vanilla supplies

    12. Plant Spiced Cider

    Plant Spiced Cider Banner

    13. Pumpkin Pie, Three Allergy-Friendly Ways

    pumpkin pie breakdown


  • Fitting Real Foods into the Budget + Round Up

    Fitting Real Foods into the Budget + Round Up

    A question that has snuck into a handful of conversations lately is, “Do you mind if I ask what your monthly food budget is?” I think a lot of moms wonder what others are spending on groceries each month, and if they are the only one spending more than they think they should be spending, or more than they can really afford. One thing I can say for sure, is that if you have been wondering that same thing, you are not alone.

    hemp seed

    I have no problem sharing my own spending with you all – on average, we spend $900-1000 per month on groceries for a family of six. A good month, with menu planning and shopping through our food co-op can mean $800. A bad month with no planning, and multiple trips to the store can mean $1200! We buy mostly high quality, organic food, and we don’t feel bad about spending a large percentage of our income on food to nourish our family. We call it preventative medicine! When we menu plan, we can decrease that by a hundred or two!  I can help you with menu planning, yet there are other tips out there for decreasing your monthly spending on food.

    fresh produce

    Since I’m not the expert on all of these things, I decided to do share a few tips I’ve learned over the years, and then also share a quick roundup of articles that have tried and true tips on shaving dollars (or hundreds) from your monthly food spending. Read on to get started this month! Please do share your own tips, trials and questions in the comments!

    mushrooms cutting board
    TIPS FROM OUR HOME:

    • Save Scraps :: Save vegetable scraps in a pail or ziploc in the freezer to add to soups or broth.

    • Compost :: It’s true that this won’t actually save you anything on your grocery bill, but it will save you money during gardening season when you don’t have to buy organic compost or other amendments. And who wants to throw away food scraps with so many nutrients in them to sit in a landfill? Whatever doesn’t get saved for soup or broth, can go in the compost bucket. If you have fruit fly issues with your compost, consider a professional grade bin, or just an ice cream pail in the freezer…

    • Grow Your Own :: Save, save, save by growing as much of your own food as possible. The easiest thing to start with is a vegetable and herb garden. If you can add preserving to the mix – freezing, canning, fermenting, etc. – you will save even more throughout the year.

    • Menu Plan :: As I mentioned earlier, menu planning has saved our family hundreds of dollars a month. I’ve had a lot of fun teaching a few menu planning workshops, and developing our resources. You can get our menu planning documents with tips, printables, and more over in the shop. Our Tiny Peasant Pantry kids’ cooking, baking, and herbal learning resource also includes our menu planning resources.

    Tiny Peasant Pantry Menu Planners

    • Join a Food Buying Club :: If you can, join a local food co-op or buying club to get access to wholesale pricing and build community at the same time.

    • Shop at Your Local Farmers’ Market or Direct from a Farmer :: There are so many great products and prices at the market, or there’s the option if you can swing it to buy in bulk – or just on a regular basis – from your local farmers. This way, you truly know what you are buying, and you have the added benefit of getting to know and supporting your local farmers.

    • Grow Your Own :: Save, save, save by growing as much of your own food as possible. The easiest thing to start with is a vegetable and herb garden. If you can add preserving to the mix – freezing, canning, fermenting, etc. – you will save even more throughout the year.

    • Cook from Scratch :: Of course this isn’t an option for everyone, as some have tighter schedules than others. That said, it is a pretty simple thing to hydrate some beans in the crock pot and the savings over canned beans are significant. If you can switch over to ‘from scratch’ just one item a month, you will be well on your way to a whole foods diet on a budget! Some homemade foods to try include beans, bread, broth, butter, canned goods such as pickles, cereal, crackers, dips, dried fruits, salad dressing, vanilla,  yogurt…

    • Take Advantage of Sales :: When expensive items go on sale, we do our best to stock up. We only do this for items that we use regularly and consider staples in our pantry – things that we will be buying anyway, and that we know will get used up before the expiry date. There is no point in buying in bulk if the food will go to waste! We look for things like coconut oil, maple syrup, beans, grains, cheese, etc.

    • Purchase Near Expiry Discounted Products :: We regularly snatch up the organic whipping cream that is discounted 50%, as well as cheese. I have found organic cheese on a significant discount because it was close to expiry and bought up almost the whole lot, took it home, grated it in the food processor, and tossed it in a ziploc bag in the freezer.

    • Eat Leftovers :: This doesn’t have to mean having the same meal three days in a row. With a bit of creativity, you can find ways to repurpose foods – this can be as simple as using leftover turkey from Christmas or Thanksgiving dinner for hot turkey sandwiches one day, and soup another day. And maybe adding the leftover rice into that same soup (or save it for rice pudding, like we do!). Even better – plan to use leftovers when you menu plan – make extra rice at dinner for a breakfast of rice pudding!

    • Batch Cook – when making a meal, double it and freeze the second serving – this will in the least save you time and overwhelm and can help use up ingredients that are about to spoil!

    apples at the farm


    TIPS FROM OTHERS

    1. Keeper of the Home :: What I Would Feed my Family on a Food Budget of $250

    About a year ago, a friend of mine sent me this post where Stephanie, of Keeper of the Home, outlines how she would feed her family if she had a budget of just $250/month for a family of five! You read that right – and we’re talking a whole foods grocery list!

    Also check out the second post in the series.

    2. Food Renegade :: Eating Real Food on a Budget

    Some great tips here for eating high quality foods for less. I love Kristen’s approach to not double-up on expensive animal proteins in a meal. We often have meals that include meat and cheese, egg and cheese – or all three, ahem.

    3. Real Food For Less Money :: 5 Ways to Afford Real Food on a Meager Budget

    I really like Millie’s down to earth approach to eating real food. It’s more of a “do what you can with what you have” approach. And really, that’s all each of us can do, isn’t it? Why stress over having a squeaky clean menu, rather than just starting where you are and working up from there?


    This post was shared as a part of Thank Goodness It’s Monday,  Natural Living Monday,  Fat Tuesday, Fight Back Friday, Unprocessed Fridays, and Simply Natural Saturdays.

  • Winter Snow Sensory Bin

    Winter Snow Sensory Bin

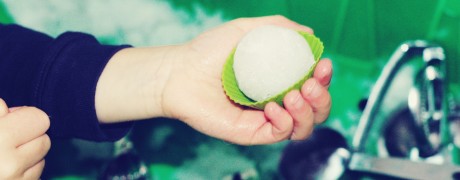
    It is -43C today with the windchill in these parts. We do try to get outside in most weather, but I think we’ll be having a snow day today.  The little ones will likely spend some time playing in the snow – inside. This is something we have done several times throughout the winter season for the past few years. In the summer, we do a water bin.

    winter snow sensory binsnow bin inside

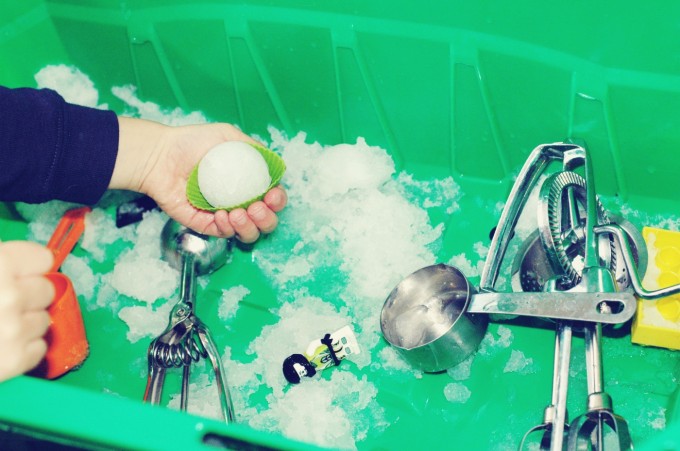
    For cold winter days, fill a rubbermaid bin with the cleanest snow you can find. Lay a large towel under the bin. Then try any of these ideas with your new snow sensory bin:

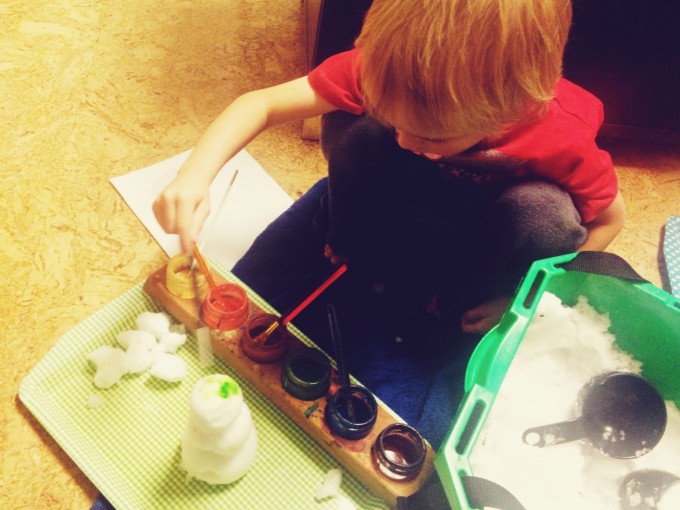
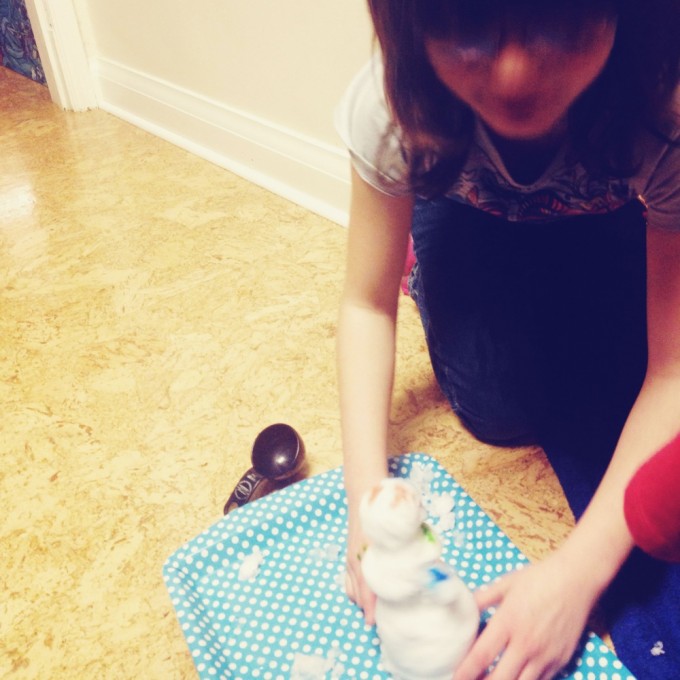
    • Make snow people – paint them with watercolour paints! Rounded measuring cups or an ice cream scoop work well to make body of the snow person.
    • Add animals – add some toy animals to the bin and the kids can make mountains and valleys to play on.
    • Treasure hunt – hide some animals, stones, gems, or other small items in the snow and have the kids find them with chopsticks or a small shovel.
    • Fill the bin with cooking and baking tools – a garlic press, measuring spoons, measuring cups, muffin tins, etc. Think of it as a mud kitchen, but with snow!
    • Provide a basket of natural items such as sticks, stones, leaves, pine cones, etc. and let their imaginations run wild.

    Please share your ideas for a fun snow sensory bin in the comments!

    snow bin snow person


    This post was shared as a part of Montessori Monday and Hip Homeschool Moms.

  • Christmas Moments

    Christmas Moments

    Both Mike and I agree that this Christmas was one of the most peaceful we’ve had in a long time. We weren’t overwhelmed with the details of the holiday, but rather focused in on Advent, homemade gifts, and togetherness. We spent one afternoon shopping, and that was it. It does help that our gift giving is limited to:

    something you want
    something you need
    something to wear
    something to read

    And at least one of those ends up being handmade by me. Actually, this year, they are yet to be handmade by me. There is a stash of flannel waiting to be made into pyjama pants for the kids that will now be gifted out at the lake house on  New Year’s Eve. I could have stayed up until 3am on Christmas Eve working to finish them. But why? Our celebration was amazing just as it was, and now we can extend the sweetness even longer.

    While we usually have a few gatherings, two sets of our parents were out of town for the holiday, and so we had an intimate celebration with just our family and my sister in our home. It was such a peaceful day of slowly opening gifts (we start with stockings, and then open a gift now and then throughout the day), enjoying them separately and together, a lovely breakfast (waffles are our family tradition), and more gifts followed by time outside in the snow, dinner, and bedtime with new stories. It doesn’t matter that the stories have been read several times throughout the day already. Really.

    Some moments from our day…

    christmas morning crew 3b fabric gift bagsmilo opening gifteating christmas breakfast 2eating christmas breakfastplaying christmas dayhomemade gifts brotherschristmas day readingchristmas day story timesmelling homemade lotionmilo opening car matbre making bracelets christmaskids playing wildcraft christmas  christmas dinnerchristmas dinner notes2

  • This Year’s Tree

    This Year’s Tree

    Over the years, we have put a lot of thought into what kind of Christmas tree, if any, to get. You can read more about our decision making process and some of the options we’ve explored in a recent post, The Great Christmas Tree Dilemma.

    This year’s tree, however, fell into place quite serendipitously. We waited longer than usual to get our tree – the plan was to get it during the third week of Advent – the week of plants. We missed that and by the time we called the local shop that stocks locally grown pesticide-free trees, they were sold out. I did a quick search online at a site I had already visited earlier in the season, and this time found another place offering pesticide-free trees. They had just listed their farm a few days before our call and were just starting out with offering their trees for sale.

    Eden Ridge farm is run by a lovely couple in a town just under an hour from our home. We all had such a wonderful time there with them, getting to know them a bit, snowshoeing to choose the perfect tree and cut it down with a little lesson from Dad on how to cut it well, and visiting around the fire. Our hosts brought out sticks and marshmallows and herbal tea to add to the merriment.

    After it was all said and done, I realized that this adventure was a perfect fit for the final week of Advent, though it was unintentional. The fourth week of Advent is the light of humankind. The way this couple welcomed us to their home, shared a bit of their life with us, and created such a special experience brought more light into our lives.

    With the tree strapped to the roof of our van, we drove home, and set the tree right into place in its little house – a family heirloom crafted by my grandfather. Pine cone angel ornaments were made, decorations were divvied up, and hung on the branches. A couple little boys curled up under the tree as soon as it was in it’s house. There is really something magical about having a real tree. Hopefully in the near future, someone will offer potted trees to replant, which would be just that much better. For now, we’re happy to support the few local growers here who grow trees without pesticides, who truly care for their trees and the earth, and who hope to build community by offering up their place to visitors. There are plans in the works to visit in the summer, to learn more about the work involved in growing the trees, as the kids made fast friends with the owners.

    hot cocoa at tree farmat the tree farmroasting marshmallows at tree farmgrandpa's tree stand pine cone angel on treedecorating the tree 2 decorating the tree b putting up starpine cone angel on tree2

  • This Moment

    This Moment

    “A Friday ritual. A single photo – no words – capturing a moment from the week. A simple, special, extraordinary moment. A moment I want to pause, savor and remember.” {joining Soule Mama today} If you’re inspired to follow along, please leave a link to your moment in the comments!

  • Advent Week 3 Activity :: Bird-Watching with Kids

    Advent Week 3 Activity :: Bird-Watching with Kids

    If you are following along with the Advent series, you can get to the original post here, and the Week 3 post here.


    One of the simplest and most rewarding ways to learn about animals in the winter is bird-watching. It can be done indoors or out, and is a great activity to engage little ones. For this reason, our week is going to focus on birds – feathers, crafting bird-seed feeders, painting tiny bird house ornaments, visiting a local animal shelter…

    Here you’ll find info about our two favourite bird books, as well as a printable bird-watching checklist that would make a great addition to your advent calendar, or a fun thing to share with your children any time of the year.

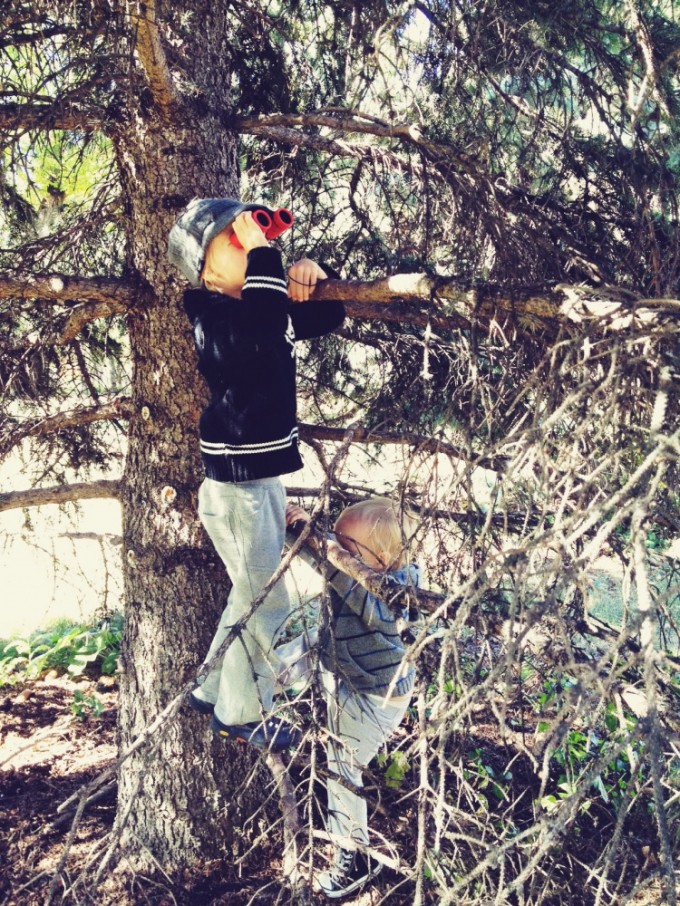
    tree bird watching new

    What do you need to start out?

    Binoculars
    A few years ago we purchased two basic bird identification books, and started a little basket with the books and a set of nice binoculars (which were very affordable at under ten dollars). The binoculars come with us on nature walks and have taken quite a beating over the past four years or so! Well worth the small investment.

    Books
    Strangely, both books are titled Backyard Birds. One is the Peterson Field Guides For Young Naturalists: Backyard Birds, and the other is Backyard Birds: An Introduction. The first is a fantastic resource with colour coded sections according to the main colour of the bird. It is easy for kids to navigate and has a digestible amount of information for beginners. The second one we love for its beautiful paintings of birds by Robert Bateman.

    Either (or both) of these books would make a lovely advent or Christmas gift.

    Checklist
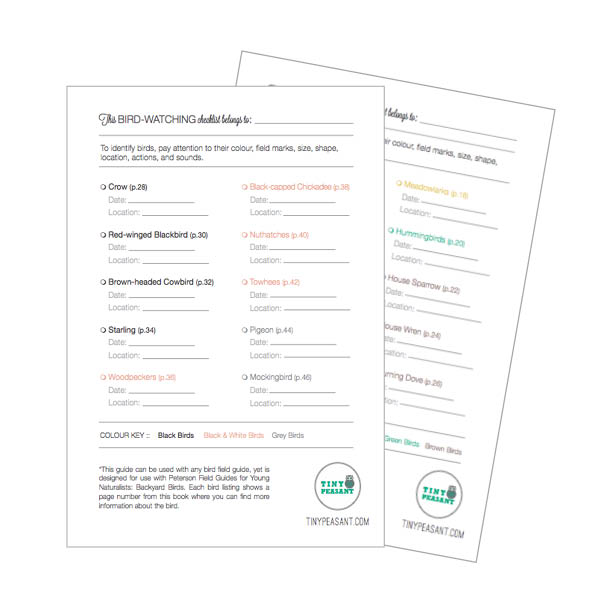
    I created a mini ‘life list’ for the kids back when we first created our bird basket, and the kids check off birds they spot and identify using our books. It turned out to be a really fun pastime for the whole family.

    Recently, I updated our bird-watching checklist to share with all of you, and I truly hope you and your little ones will enjoy it as much as we do. There are two versions available – one is designed to work in partnership with the Peterson guide and the other can be used on its own or with another book. Print if off and keep it in your own birding basket, or in your backpack to go along on nature walks. You can download it here.

    tiny peasant bird-watching checklist preview


    This post was featured at Thank Goodness It’s Monday, and shared as a part of Thank Goodness It’s Monday, and Montessori Monday.

  • Gifts Kids Can Make + Give

    Gifts Kids Can Make + Give

    Below are twelve gifts that are simple and engaging enough for kids to make as Christmas or other gifts for teachers, friends, and family. Some have links to posts that we’ve published here at Tiny Peasant, and others are just to provide the idea or send you somewhere else to get the full instructions! All of them are things that our little ones (and older one) have made and so they are tried, tested and true.


    CRAFTS

    1. Felted Stone Paperweights or Decorations

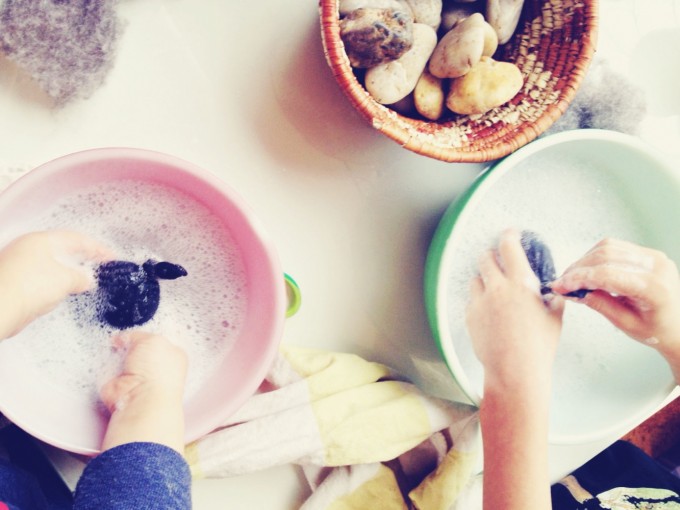
    Kids love the warmth of this activity, as they dip their hands into warm soapy water. The resulting felted stones can be gifted for use as a decoration or paperweight. Find our how-to post here.

    felted stones - rubbingfelted stones finished


    2. Felted Soap

    Follow the directions for felted stones. Replace the stones with soap. Leave the dish soap out of the water, as the soap itself will provide the suds.

    You can include a little note, if you’d like, to use it just like regular soap, as some folks might think it is just decorative!

    We also sell Tiny Felter kits in the shop, if you’d like to get the supplies there for gift-making – and they also make a sweet stocking stuffer or gift for future crafting as well!

    making felted soap felted soap

    IMG_3672

    3. Framed Artwork

    Purchase affordable frames from a local store (IKEA for example) and frame some of your children’s artwork to give as gifts. Try talking with your little ones about drawing something that their recipient will be interested in or love. Check out some how-to-draw books from your local library if your crew would like some inspiration.

    framed artwork

    4. Mason Jar Candles

    When we were making mini pumpkin candles this fall, we had leftover melted beeswax. I had a nice short mason jar on hand, as well as extra supplies, so quickly made a simple mason jar candle. This would be a very simple thing to do, though might not have enough steps to safely include little ones. I think it would be a great project for teens! You can find instructions here – just use a jar or other container instead of a pumpkin. Also check out this helpful post: Using Beeswax at Home.

    A friend of ours made a lavender flower version of these. Oh my goodness. Yes.

    mason jar candle lit mason jar candle

    5. Play Dough

    If you have flour, salt, cream of tartar, oil, and some elbow grease, you are ready to go! Check out our recipe for pumpkin spice play dough (both regular and gluten free), and omit the spice, adding in an essential oil such as orange or lavender, if desired. Package up your homemade play dough in mason jars or tupperware, put a label or some nice patterned fabric under the sealer ring, and you have a great gift for little ones. You can also try gingerbread play dough for the holidays!
    Tiny Maker Kit


    PANTRY

    6. Herbal Tea Blends

    Just fill your jar or tin with healing herbs! Add a label or tag with instructions if necessary. So, so simple for little ones and truly a lovely gift. If you can get outdoors and collect some of your own herbs to include, even better. The rose hips shown were harvested by our three and six year olds.

    We made pine and cedar tea blend, as well as a rose hip, nettle, and elderflower blend. Get creative or look online for ideas!

    pine-cedar tea giftsHerbal Tea Gift

    7. Herbal Salve

    Even though this seems like it would be an involved project, it is really quite simple with a decadent result. Get the recipe here. You can also find our Tiny Herbalist kit in the shop, a beautiful cotton pouch stocked with tins, beeswax, recipes, labels, a beautiful handmade herbal journal and more.

    calendula salve gifts

    8. Essential Oil Lip Balm

    We made these last year, using a great recipe that was simple to follow with fairly basic ingredients. Bonus: You’ll also find a recipe for peppermint bark on the same page as the lip balm recipe!

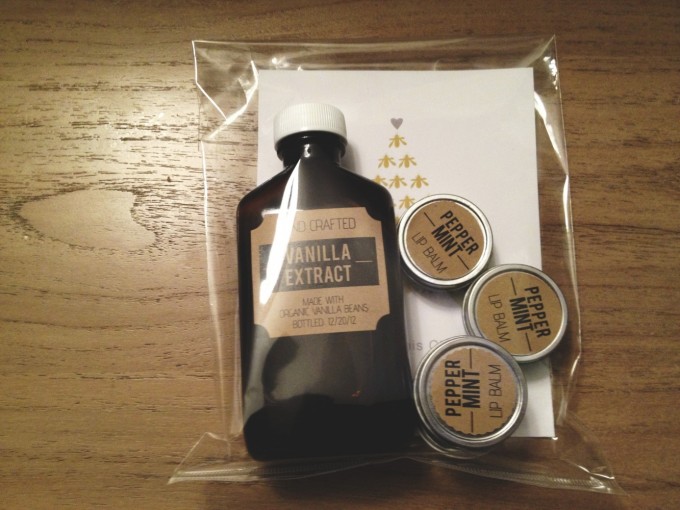
    vanilla packaged

    9. Vanilla
    It truly doesn’t get much simpler than this. Older kids can help with scoring the beans, and all ages can drop the beans into the bottles, and help with the funnel and pouring. You can get the full instructions in our how-to post, which also links to our free, printable vanilla labels.

    vanilla supplies

    10. Fair Trade Fudge

    We made this using Cocoa Camino fair trade chocolate. So, so good! Get instructions and flavour ideas here.

    peppermint candy cane fudge

    11. Homemade Cookies

    Make your favourite recipe, and put it in a pretty package to gift to friends, family or teachers. We made peppermint shortbread. We left out the chai, and subbed at least part whole grain flour and a whole sugar…

    Another favourite is Spruce Tip Shortbread cookies. Get it the recipe here.

    You’ll find ten great cookie recipes in the ebook Nourishing Cookies for a Healthy Holiday by Diana of My Humble Kitchen.

    teacher gifts - cookies 2 teacher gifts - cookies

    12. Chocolate Dipped Goodies

    You can use regular or gluten-free pretzels, or any other treat (almonds, homemade gummies, earth/bliss balls, homemade cookies) for this recipe. Using a double boiler, simply melt about 3 tablespoons of coconut oil along with 1.5 cups of fair trade chocolate chips, baker’s chocolate, or a chocolate bar. If you’d like it to be sweet, add a few tablespoons of honey (if you are using chocolate with added sugar, this won’t be necessary). Use tongs to dip the pretzels into the melted mixture and then lay on a cookie sheet to set. Package up in a canning jar or other nice package!

    chocolate pretzel love


    This post was featured at Real Food Forager, and shared as a part of Thank Goodness It’s Monday,  Natural Living Monday,  Fat Tuesday, Simple Lives Thursday and Simply Natural Saturdays.

  • Simply Healthy Fudge

    Simply Healthy Fudge

    This is some seriously simple fudge! With some nourishing ingredients, and no added sugars, I’m thinking it is going to make an appearance several times in 2014! We made this our official December recipe for our 10 year old’s baking program, which means we *had* to make it three times. Ahem.

    We  decided to make it a candy cane fudge, by adding some crushed candy cane and peppermint to the mixture and more crushed candy cane on top. Of course, this isn’t a super healthy fudge anymore, but the basic recipe is sugar free and you can easily keep it that way! There are a lot of suggestions at the end of the post for other flavours, many of which sound so good, and good for you.

    BASIC RECIPE

    Ingredients:

    • 2 cups dark, fair trade chocolate (we used cocoa camino baker’s chocolate and topped off with enjoy life chocolate chunks because we didn’t have enough cocoa camino left to make 2 cups – note that the chunks have sugar, so I recommend the straight dark chocolate)
    • 1 cup coconut milk (the thicker part from the top of the can)
    • pinch of sea salt

    candy cane fudge ingredientscandy cane fudge crushed

    Instructions:

    1. Break up chocolate, if necessary.

    2. Add all ingredients to a double boiler and melt over low heat.

    fudge heating up

    3. Add any optional ingredients.

    adding extras - fudge

    4. Pour into a square baking dish lined with wax paper.

    fudge finished

    5. Add any optional toppings.

    6. Set in the fridge.


    FLAVOURS TO TRY:

    I am super excited to try some of these in the near future. Particularly, maple walnut, toffee + salt, and orange + macadamia. Yum.

    • candy cane / peppermint
    • vanilla
    • maple walnut (maple syrup + walnuts)
    • pumpkin
    • toffee + salt
    • peanut butter (or sunflower butter, etc.)
    • coconut
    • orange zest + macadamia nut
    • white chocolate + cranberry

    What is your favourite kind of fudge? Share in the comments!


    This post was featured at Thank Goodness It’s Monday and Simply Natural Saturday, and shared as a part of Natural Living Monday,  Fat Tuesday,  Simple Lives Thursday, Fight Back Friday, Unprocessed Fridays, and Simply Natural Saturdays.
  • This Moment

    This Moment

    “A Friday ritual. A single photo – no words – capturing a moment from the week. A simple, special, extraordinary moment. A moment I want to pause, savor and remember.” {joining Soule Mama today} If you’re inspired to follow along, please leave a link to your moment in the comments!