
With a mountain of snow in view out my window, I received an email the other day about children’s soccer. Already? It seems early, but it is true that organizing all those little people into teams is no simple task and one that warrants a good deal of prep time.
With the soccer email, I was reminded of some photos I wanted to share with you that were taken years ago, and now seems like the appropriate time. If you’re like us, it seems to take a millennia to get the kids dressed and ready, gather snacks, water bottles, a picnic blanket, and game gear and get out the door. One way we tackle this problem is to keep our gear in special bags, hanging on hooks right by the door.
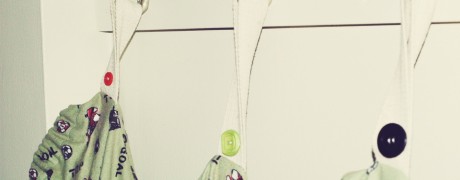
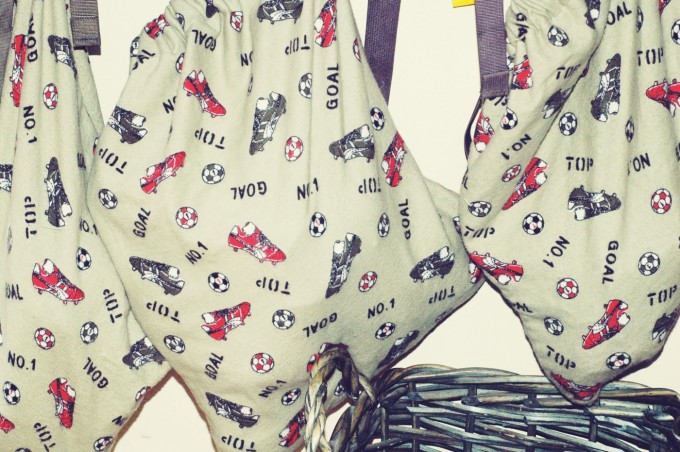
A few years ago, we stitched together some soccer themed fabric into simple pouches with elastic openings and a loop handle. Cleats, shin pads, jerseys, and shorts, and possibly a water bottle or hat stay in this bag aside from when they are being used or washed. This really plays into the whole concept of creating rhythm in the home, as the kids know what to expect. They don’t have to wait for the adults or go on a scavenger hunt to find their gear. They just know. They know where their bag is, and that their stuff is in it. So when it’s time to get ready for soccer, they each go to their hook, grab their bag, get dressed, toss their water bottle in, and head out the door. I feel this really ties in with the Montessori view of a prepared environment – with a place for everything and everything in its place. If only we could get there with all of our lego!
Dirty cleats are tossed in a basket that is kept under the bags, so they’re still all in one place, but not getting dry mud all over the floor.
You can apply this idea to any kind of sport or activity that doesn’t require a large amount of equipment – swimming lessons, dance or martial arts class, baseball, etc.
Now is really the perfect time to whip these up, so you’ll be enjoying gardening or other outdoor activities come April.
Instructions
I’m not a pattern-maker, or much of a pattern user, for that matter. I didn’t use a pattern for these bags and thankfully the kids are quite forgiving – or just not that focused on the fine details of sewing construction. I’ll try my best to outline the steps I took here:
1. Cut out a long strip of fabric, double the desired height, folded in half – wrong sides out.
2. Cut a piece of strapping or rope for a handle. Fold it in half and insert and pin between the two layers of fabric, about 4 inches from the top (without hem), keeping in mind you’ll need to fold the fabric over for the hem. So just judge where you’d like the handle to be.
3. Stitch up the sides of the bag.
4. Make a hem with an opening to run an elastic or drawstring through. I used a piece of elastic probably about 4″ shorter than the diameter of the opening. This was so the kids’ gear wouldn’t fall out, but it would still be easy enough for them to get things in and out of the bag – and not have to use a drawstring or tie of any kind.
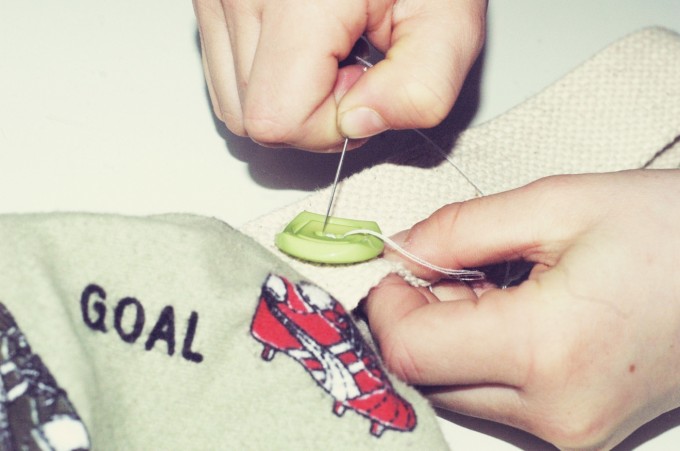
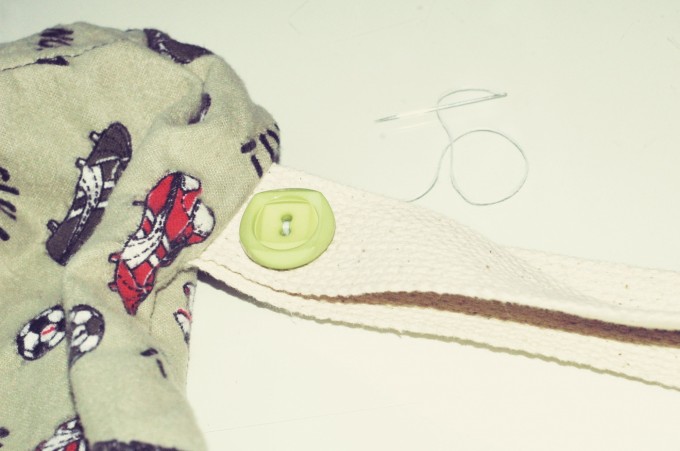
5. Because we had three children playing soccer at once, each of them chose and stitched on a button from our stash, so they can easily identify which bag is theirs.
If my instructions are as poor as I imagine, you can use a pattern such as this one, for a simple drawstring pouch, and use the drawstring or an elastic. Just add the handle loop before stitching up the sides, if you use elastic in the hem. If you use a drawstring, the string becomes your handle.
If you have any tips for staying organized for the sports season, please share the in the comments!
This post was shared as a part of Simply Natural Saturdays, Montessori Mondays, Natural Living Monday, and Thank Goodness It’s Monday.
I think this is a wonderful and practical idea for kids. Designed for everyday use, these sport bags have a simple and functional design. Providing parents with creative options is great inspiration.