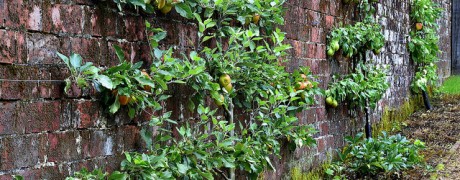
If you’re like me and you love things to look beautiful, you desire to grow your own food, and you live in the city, you just might fall in love with the centuries-old practice of espalier, which is training trees flat against a supporting structure.
In the middle ages, espalier was used in castle courtyards where space was limited. Today, this practical benefit extends to city dwellers looking to keep an urban orchard. Now, as then, the effect of espalier is dramatic and romantic.
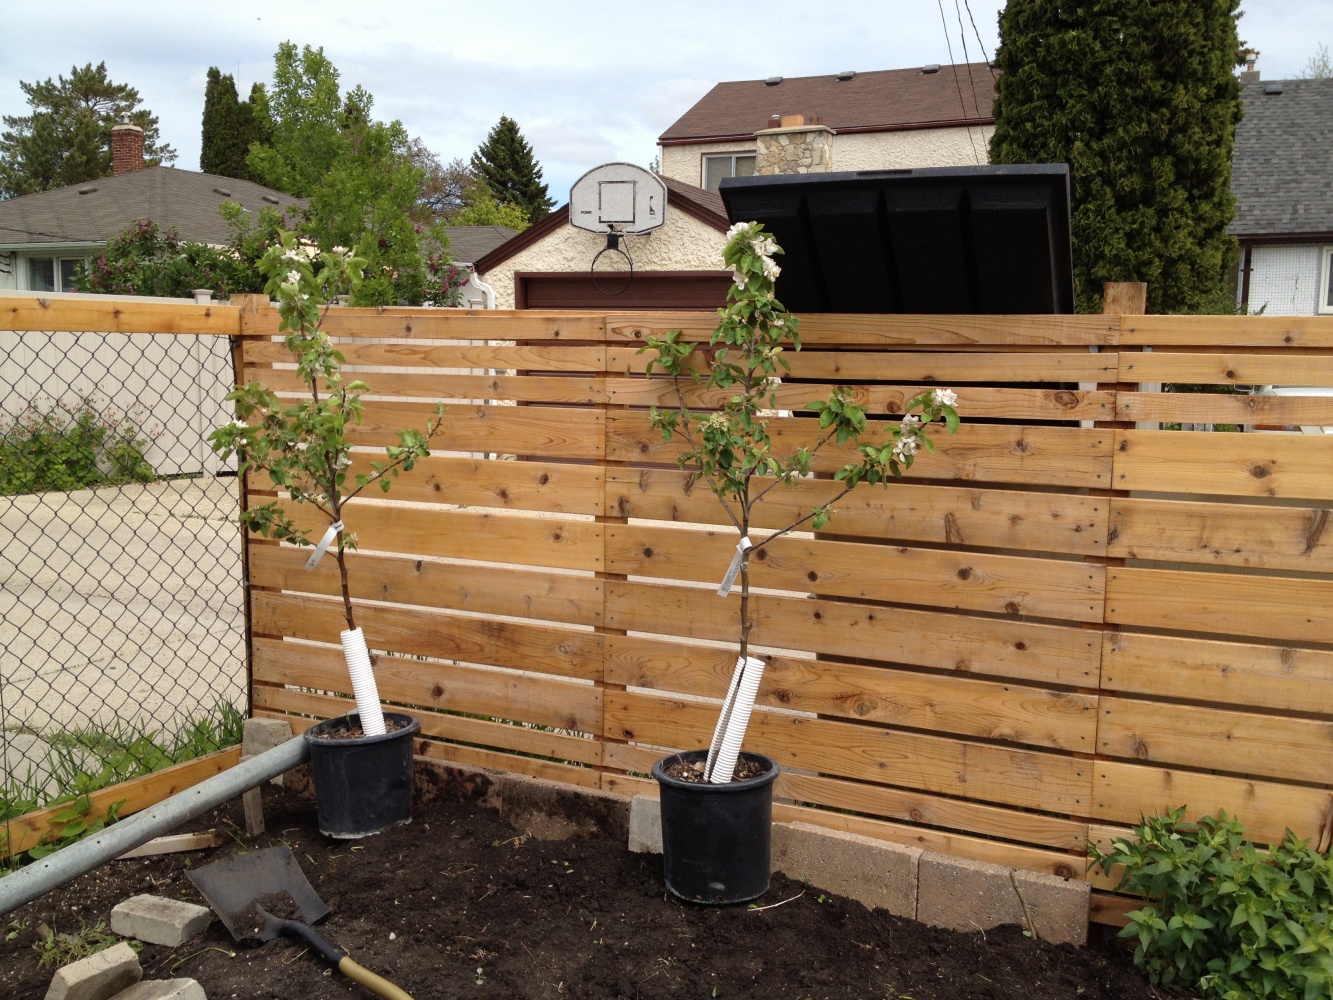
My husband and I tackled this project together, planting four dwarf apple trees along our fence. We also incorporated a permaculture technique called a swale that allows water to soak into the root system of the trees.
Keep reading for a step-by-step photo tutorial to get you started with your own urban orchard.
Please note that we are not experts, but average folks who squeezed this project into a busy season with four children, work, and homeschooling. We probably haven’t lived up to the standard of the courtyard gardeners of the middle ages!
SUPPLIES:
Dwarf apple trees.
We chose Dwarf Goodland apples based on what was available at the garden centre and guidance from the knowledgable owner about our specific project and location. We tried to find trees that had two strong branches that looked like they could be trained laterally.
Our fence is 16 feet long, and we planted four trees, giving each tree 4 feet of width. The branches will overlap, and that’s okay in this context. Normally, you want to prune off a branch if there are two crossing over each other.
Tools.
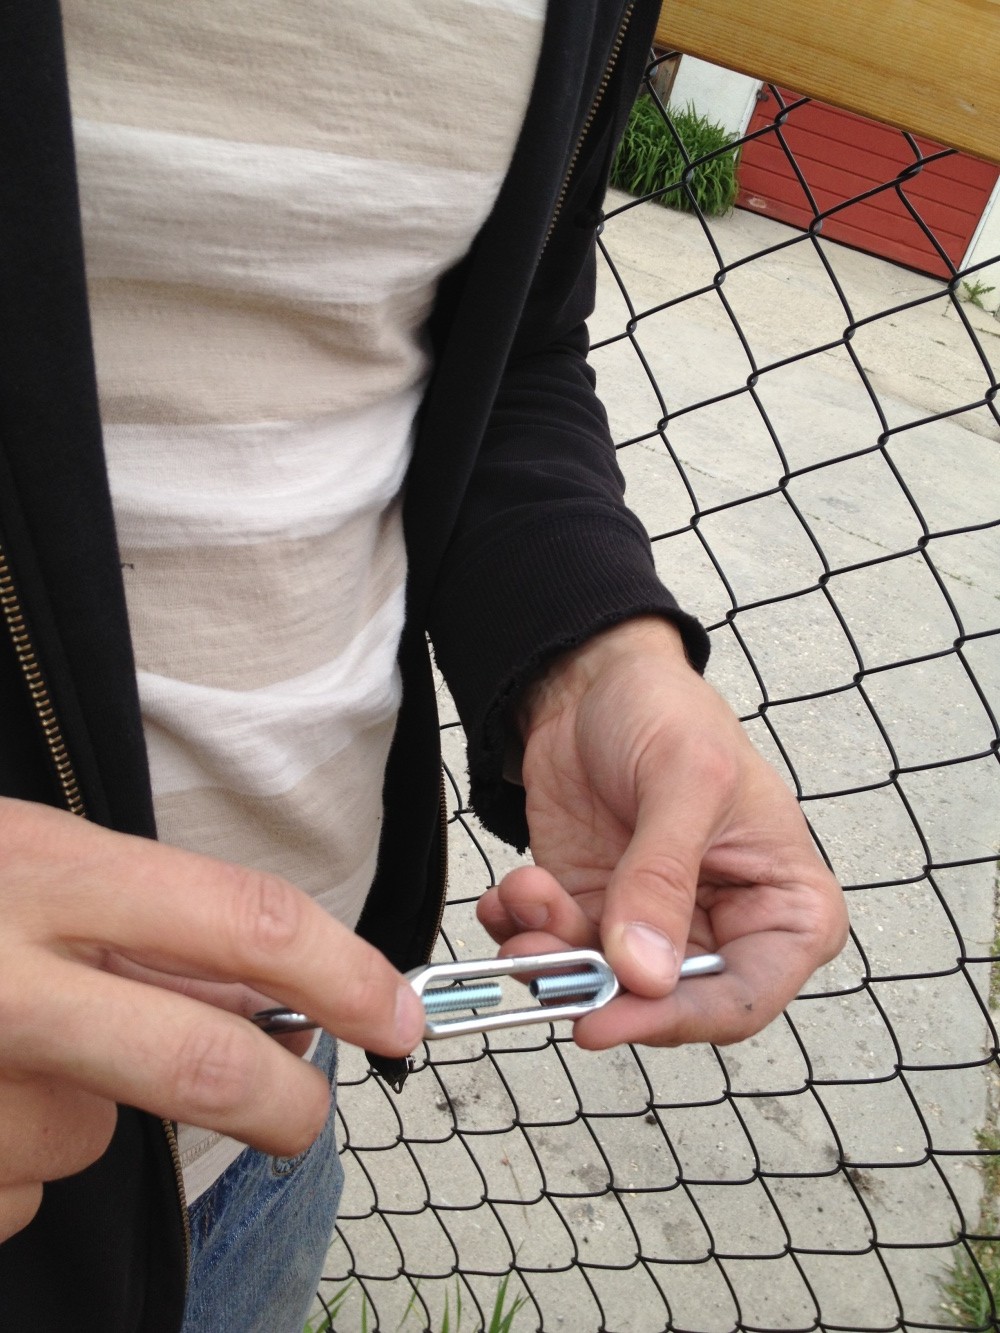
You’ll need to hit your local hardware store for 14 gauge galvanized steel wire, eye hooks (or eye bolts), and a turnbuckle. Who doesn’t want to do a project where you get to use a turnbuckle? The number of eye hooks you’ll need will depend on the height and length of your supporting wall or fence.
A tape measure, wire cutters, and though not shown, a pencil to mark ‘the spot’, a drill to make pilot holes for the eye bolts, and a screw driver to help turn them. Oh – and a shovel would be helpful, too!

Amendments.
We are very blessed to have great soil in our yard. Things grow like we’re in prehistoric times back in this little corner of our yard. So, we’re not very finicky about amendments, but we did toss in some compost, and the owner of our favourite garden centre, Sage Garden Herbs, sent us home with a container of bone meal. Look to your trusted source to decide on what amendments to use – it will very likely depend on the type of tree you espalier, your soil type and it’s condition, and the region you’re growing in.
STEPS:
Measure & Plan.
Measure the length of your supporting structure and then evenly space out your potted trees. You might want to do some more research online to decide on a pattern for your espalier project. Once you know your pattern, you can decide how many levels of wire you will need to sufficiently support the branches of your trees as they grow and eventually bear fruit.
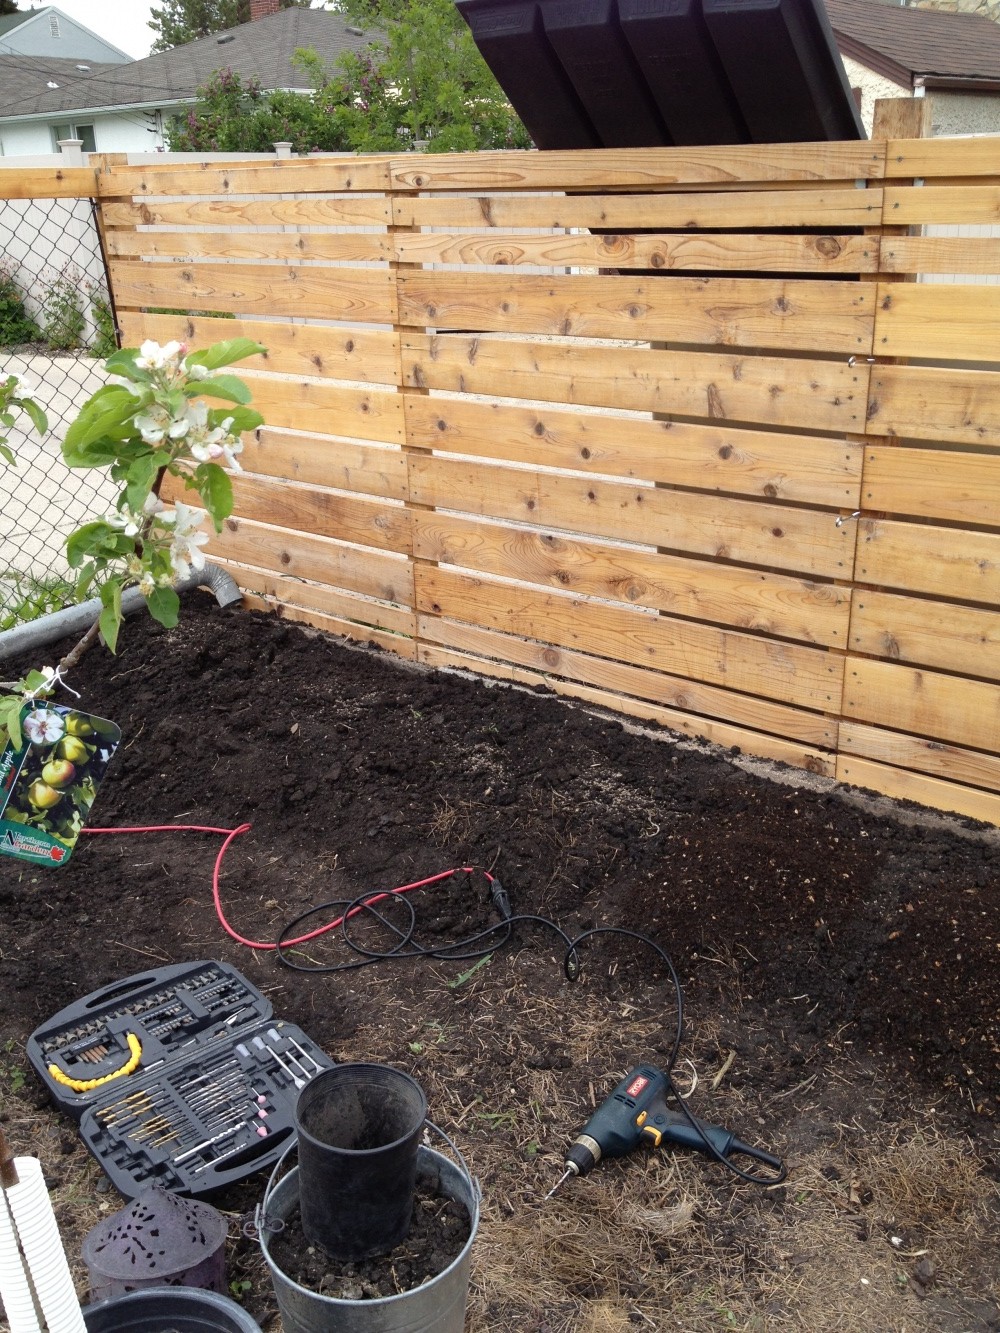
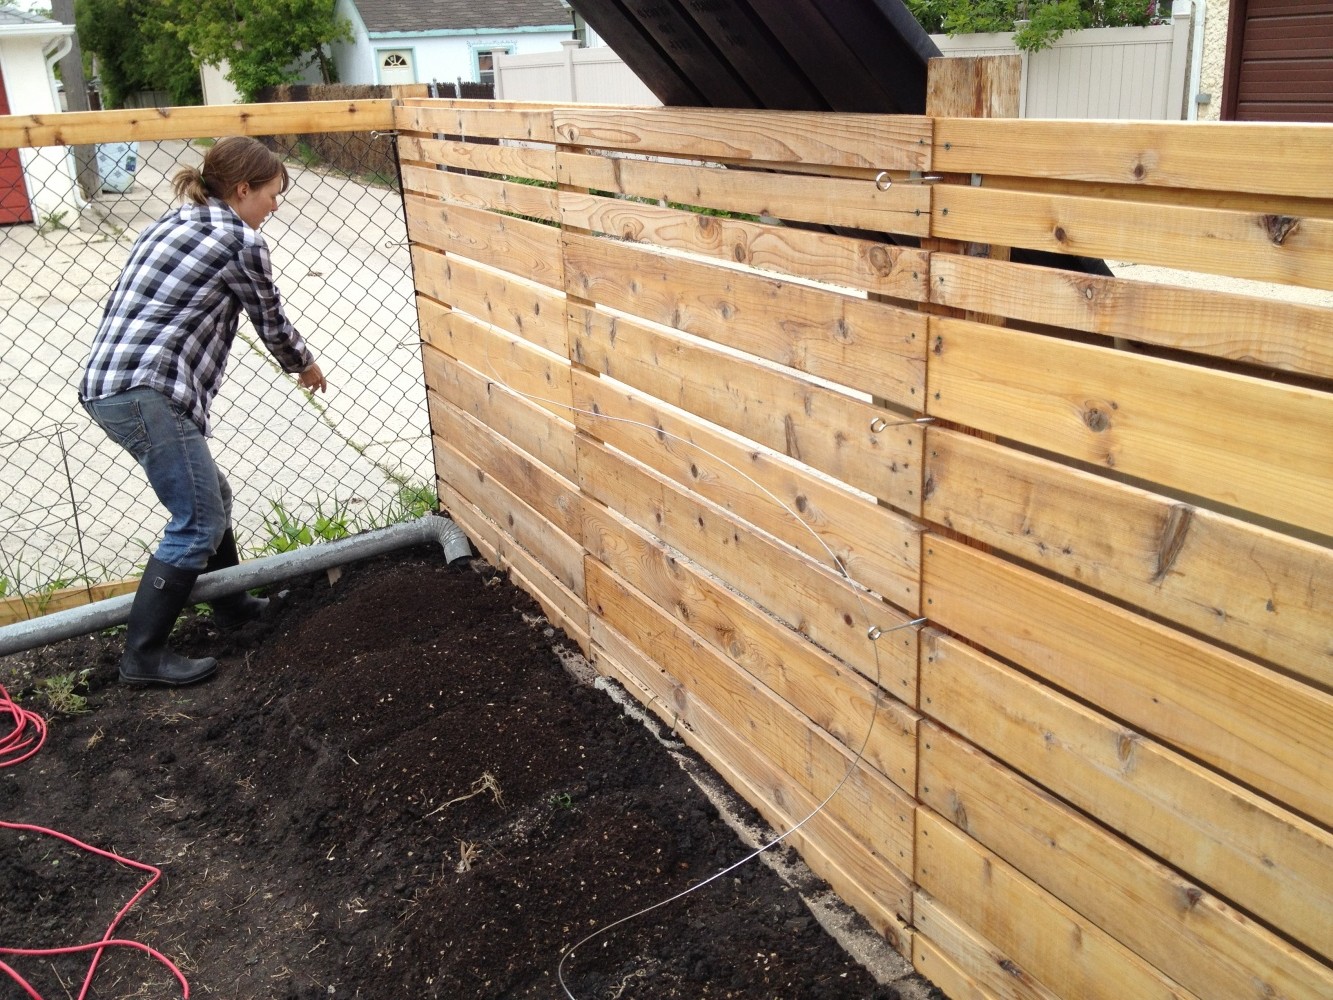
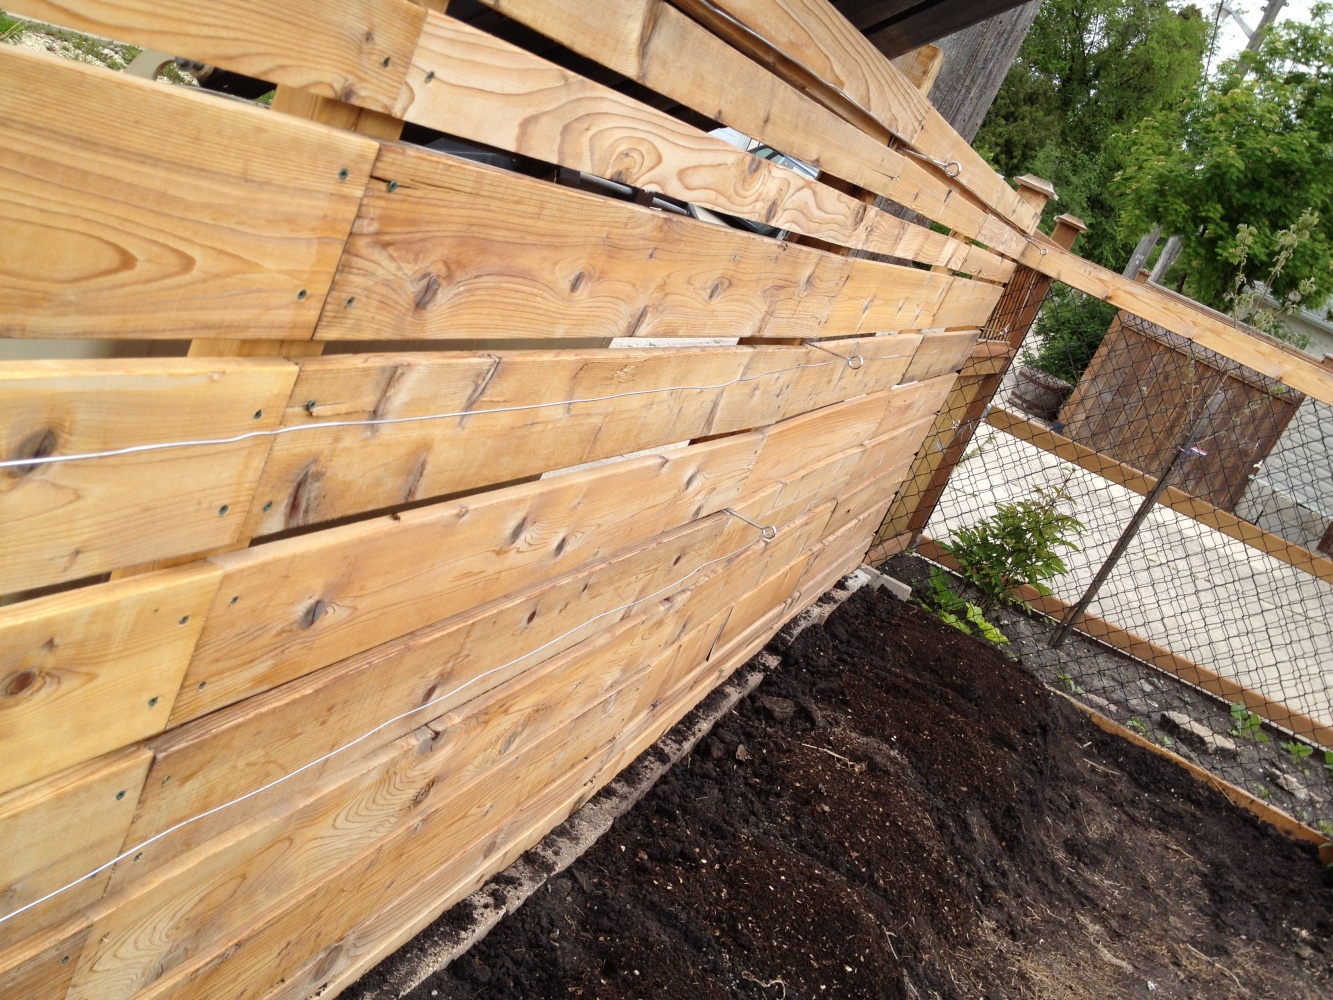
We installed our espalier wire along our wooden fence. We already had our trees, so we knew how high we would need the wires, starting just above the lowest branches in the tree. From there, we installed three rows of wires running along the full width of a 16-foot fence.
Pencil in where you’ll place your eye hooks.
Set Up Your Scaffolding.
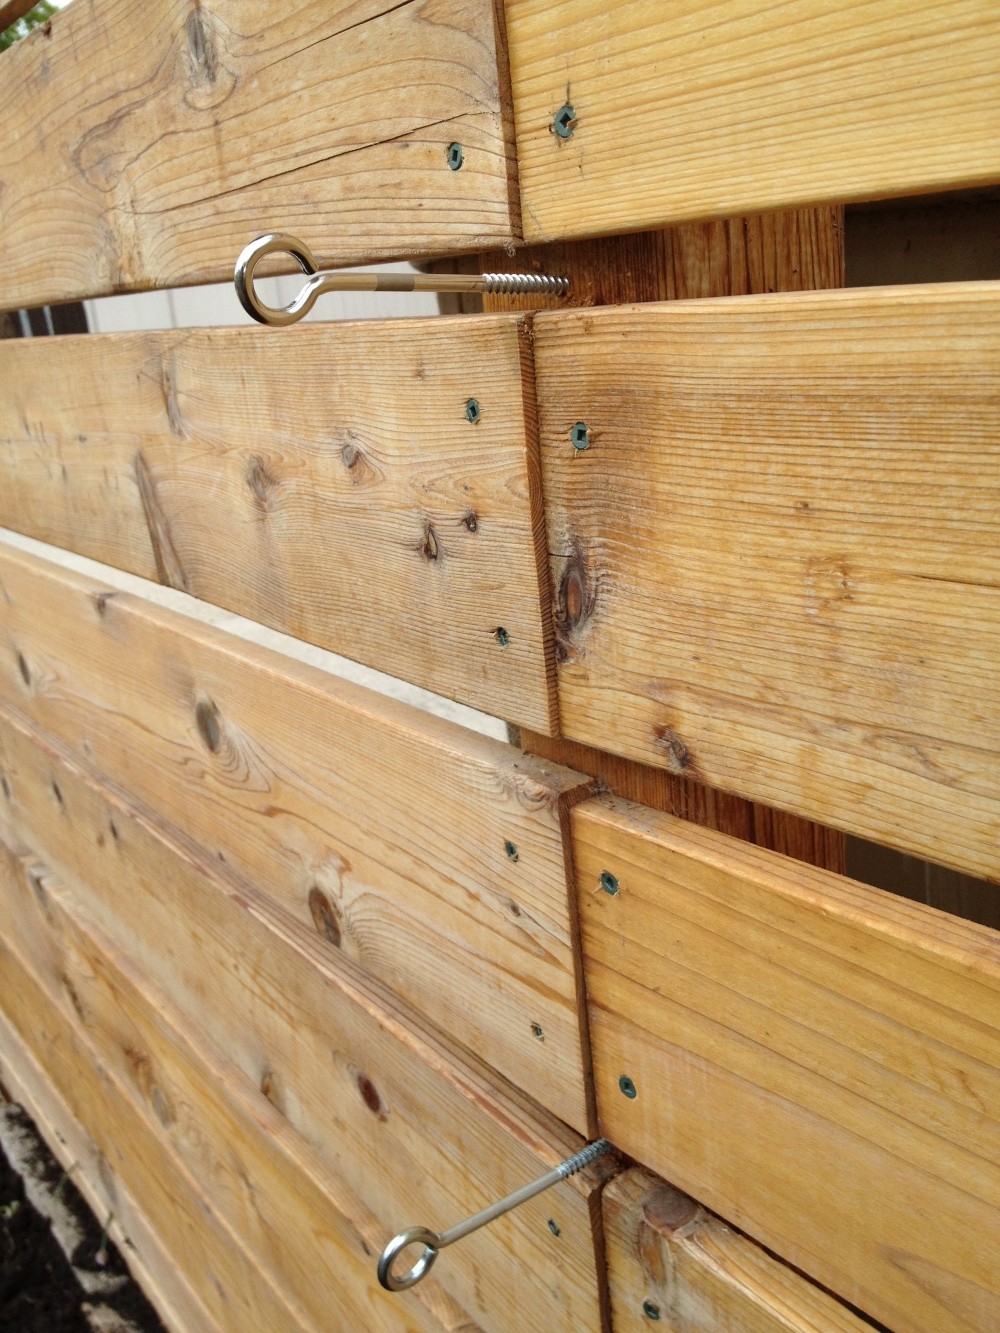
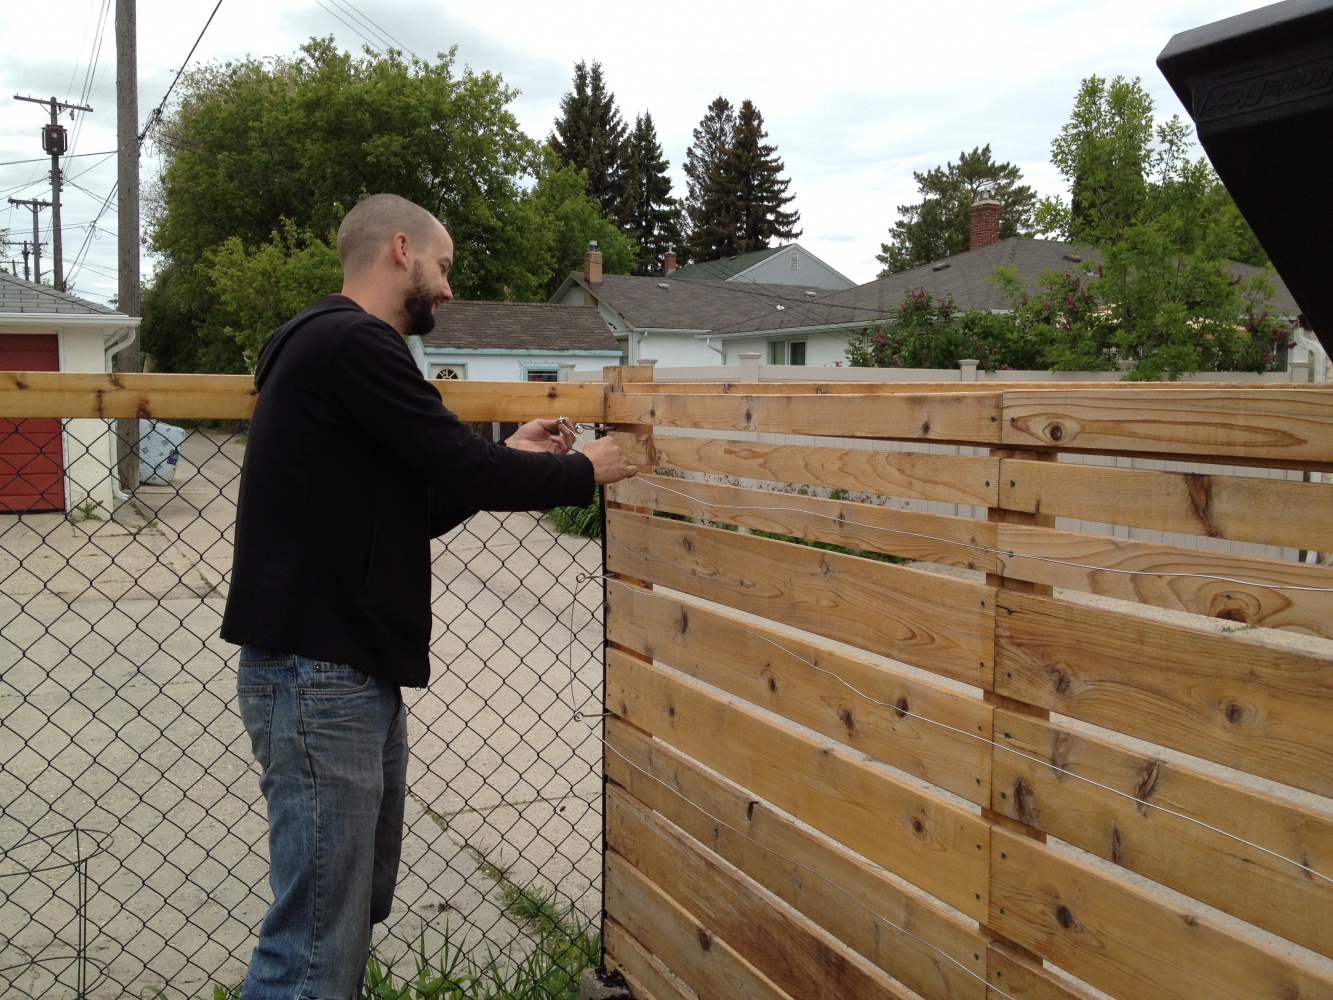
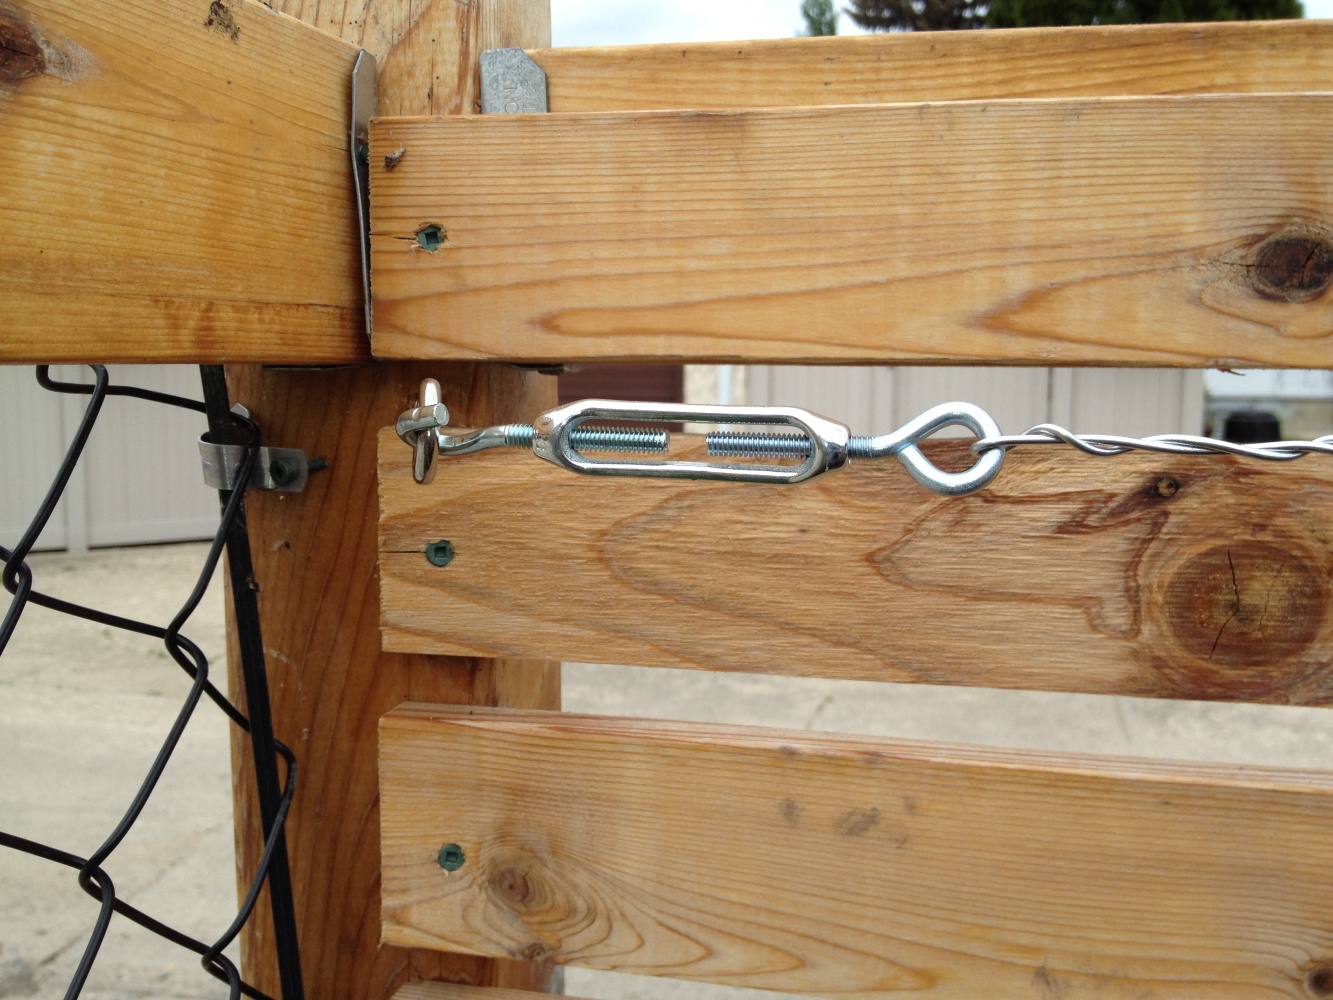
Drill pilot holes for the eye hooks and then twist them in place, using the screwdriver for extra leverage. We used three eye hooks on each post; one for each row of wire. Get them long and strong; ours weren’t, and started to bend quite a bit when we tightened the wire. The trees should be 3-4 inches away from the fence, so you need them longer than that to sink into the wood enough to hold well. Once your bolts are in place, grab your wire (and hopefully a co-conspirator) and get to it.
Feed the wire through all the bottom eye hooks, then up and across the next row, until it’s through them all. Twist the wire around itself at the first eye hook. Take your turnbuckle and twist it so that it’s extended all the way out. Put the hooked end of the turnbuckle onto the last eye hook, and pull the wire as tight as you can get it, then twist it onto the closed end. Tighten up the turnbuckle, and your wire is ready.
Prep, Plant & Prune
While setting up the scaffolding system, you may have compacted the soil that your trees will be planted in. Prep the area and plant your trees according to the instructions, adding whatever amendments you need.
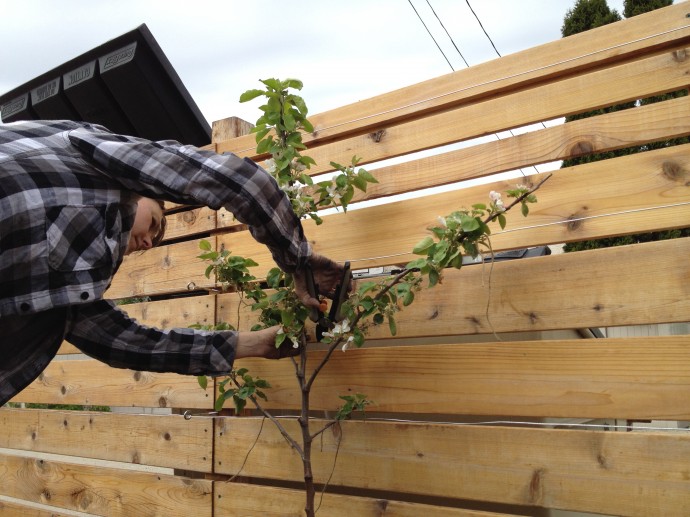
Next, you can prune off any branches that are growing toward you or toward the fence or wall. Please check your favourite gardening book or website for information on proper pruning technique!
Using garden twine, strips of nylon or jersey fabric, tie the remaining branches to the wires, guiding them into the pattern you chose. Ours have two 45 degree branches on either side of one vertical. The side branches will criss cross with those of the neighbouring trees. You want to give the branches breathing room, so the twine doesn’t dig into them – this can leave the tree vulnerable to infection. If you use a material that won’t degrade quickly, remember that your branches are growing and you will have to loosen the ties over time.
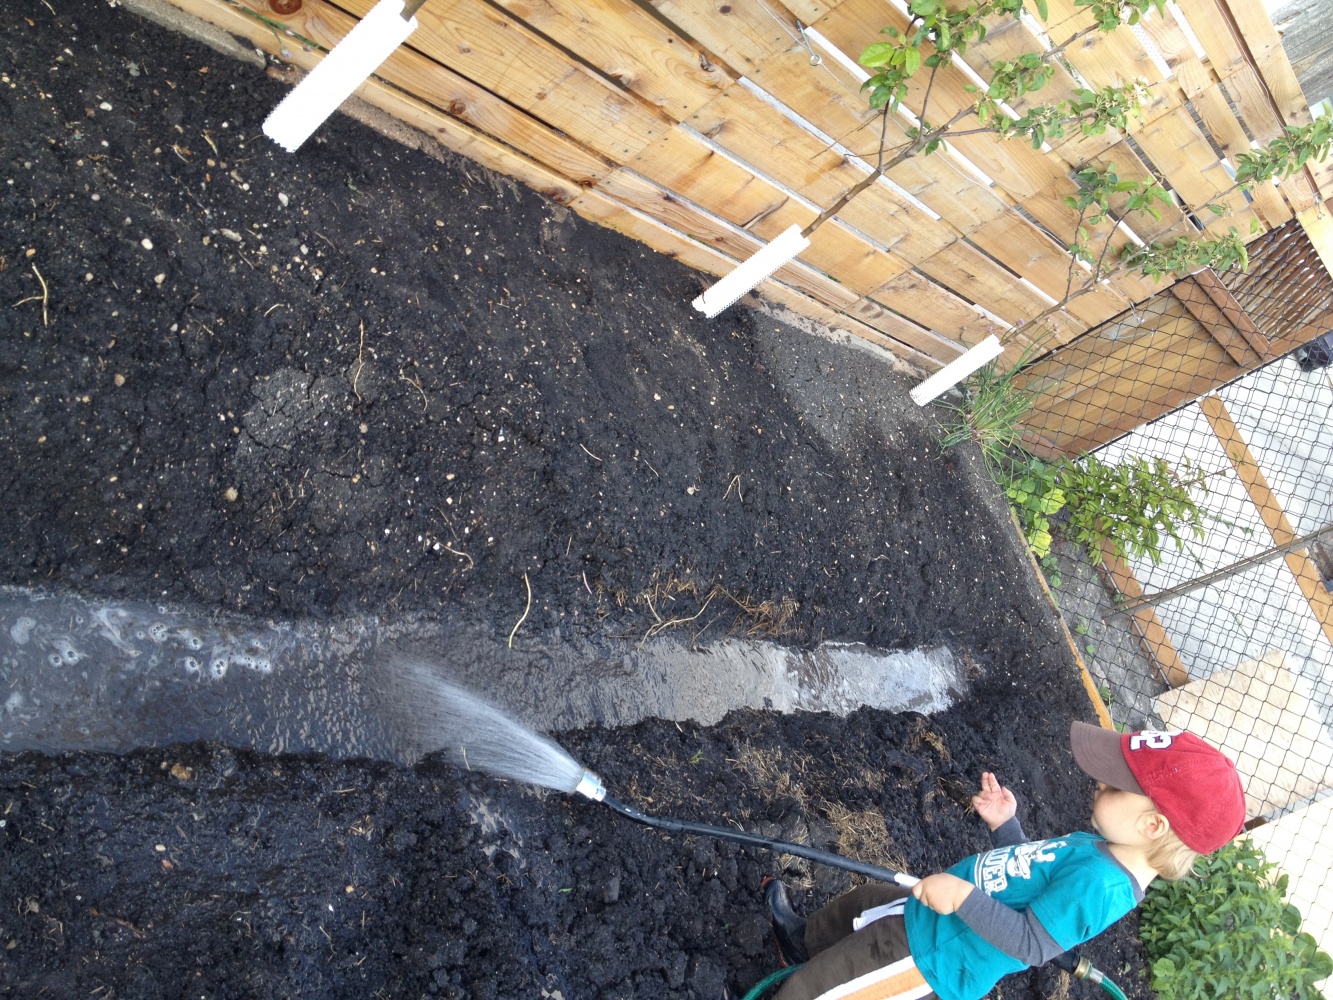
Now that you have your orchard planted, coax some pollinators into your yard with plants like Bee-Balm (aka Monarda, Bergamot or Bee-Mint). You can plant a variety of herbs, bulbs, annuals and perennials around your trees, providing a living mulch and beneficial companionship. We mulched and planted dill, chives, strawberries, nasturtium, and a variety of native flowering perennials around the trees. Finally, we dug a swale, shown below. We fixed it up after this photo was taken, and also added mulch and let some ground cover creep over it.
Add some seating and you have a very practical and romantic little orchard!


*apple espalier on brick wall photo credit: steeljam